Configuring Mercury Controller – IP Client
Overview
Mercury controllers can be configured in two modes:
IP Server (default): The driver initiates the connection to the controller. Suitable for networks without firewalls between the application server and the controller.
IP Client: The controller initiates the connection to the driver. This mode is required when the controller is behind a firewall.
This guide explains how to configure a Mercury controller as an IP Client.
Prerequisites
Security management software version 10.9.94 or higher
TCP port open on firewall (default: 3001)
Controller network settings: IP Address, Subnet Mask, Default Gateway
Controller MAC Address
Server IP Address hosting the Mercury Driver
I. Configure the Controller for IP Client Mode
Log in to the Controller Configuration Manager web setup page (use Internet Explorer if available).
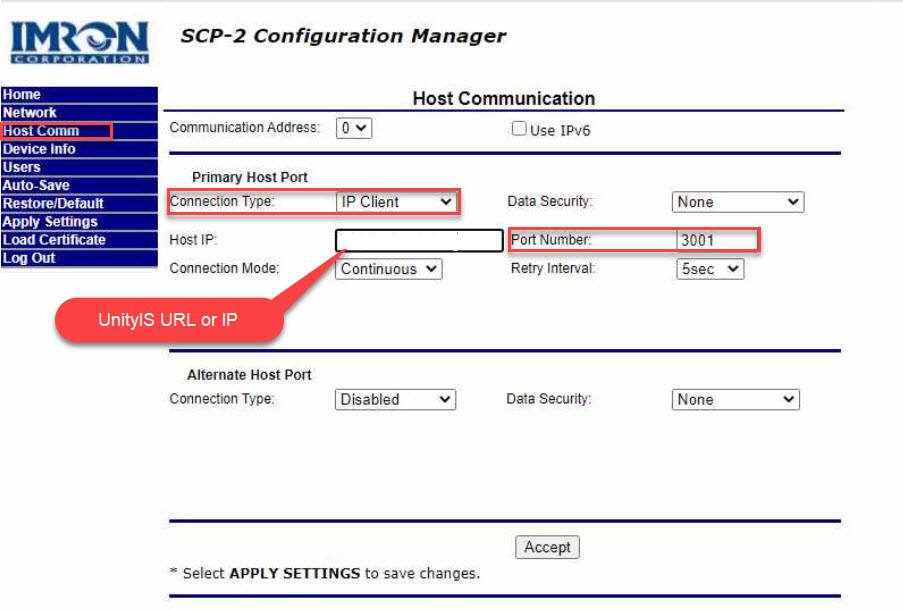
Under Host Comm:
Set Communications Address to 0. (Other values are not supported.)
Set Primary Host Port Connection Type to IP Client.
Enter the Host IP (server running Mercury Driver) and Port (default: 3001).
Set Connection Mode to Continuous. (Required.)
Set the Retry Interval as needed.
Click Accept, then Apply Settings to save.
II. Add the IP Client Controller in the Security Management Software
Open the Web Client, click on Configuration > Hardware Manager add a controller.
Select the new controller and update Properties:
Set Connection_Type to 7 – Ethernet (IP Client).
Enter the controller’s MAC Address (required for IP Client).
For IP Server mode, MAC is auto-filled.
The controller will attempt to connect using the configured IP_Client_Port.
The driver will recognize it by MAC Address and bring it online automatically within a few seconds.
If not, toggle the Poll property (check/uncheck).
✅ The controller should now be successfully connected in IP Client mode.