Introduction
The UnityIS Web Milestone Access Control Module (ACM) integration merges IMRON Corporation’s world class open architecture security management software and Milestone’s video management system into a powerful security solution under a single, common operating picture using the Milestone XProtect Smart Client. The integration gives users a consolidated interface to operate access control systems. Dedicated functions in XProtect Smart Client enable users to effectively monitor access events, manually control passages, and conduct investigations on specific access points or cardholders from the UnityIS security management software. The integration is scalable supporting small sites to enterprise sites and allows the operator(s) to view UnityIS access control and alarm transactions from the Milestone XProtect Smart Client. The UnityIS open architecture offers legacy customers a method to leverage their existing installations and expand using the latest innovative field hardware.
Prerequisites
Please ensure that you have the following prerequisites:
- UnityIS v 11.5.x or higher
- UnityIS Video Manager Module license
- Milestone XProtect Management Client and valid door licenses
- XProtect Smart Client
- Milestone XProtect Event Server
- Microsoft SQL Server 2012 or newer (any suite)
- Milestone ACM plugin files
Note: All versions of Milestone 2017 or newer is compatible with the integration. Please ensure that your Milestone software supports Milestone Access.
Installation of the Integration
I. Install or Upgrade UnityIS
The new Milestone ACM integration REQUIRES UnityIS version 11.5.x or higher. To obtain the full installation (For NEW INSTALLATIONS ONLY), please contact IMRON Technical Support (support@imron.com).
II. Install the Milestone ACM Driver
Log into UnityIS & navigate to Hardware Manager (Configuration>Hardware Manager)
Click on 'Address..' and then Add Driver
In the 'Add New Driver' window, select the Driver Type: Milestone ACM Video Driver
Click on the newly added Milestone ACM Driver in the Hardware tree to view the properties pane and then change the following:
ACM Server Port: 5000
III. Installing and Configuring the Milestone ACM Plugin
On the UnityIS Server, open Windows File Explorer and navigate to the UnityIS installation folder (Typically: 'C:\Program Files (x86)\UnityIS\Lib).
and copy the 'x64' folder.
Log into the Milestone VMS Event Server and stop the 'Milestone Event Server'.
Open Windows File Explorer and navigate to the Milestone 'MIPPlugins' folder (Typically found in 'C:\Program Files\Milestone\XProtect Event Server\MIPPlugins') and paste the 'x64' folder. (Due to Windows Permissions, you may have to paste the folder into the Desktop first and then copy and paste into the 'MIPPlugins' folder).
Start the Milestone XProtect Event Server .
Launch the 'Milestone XProtect Management Client' and in the 'Site Navigation' list select 'Access Control'.
In the 'Access Control' pane, right-click on 'Access Control' and select 'Create New'.
The 'Create Access Control System Integration' window will open, enter the following:
Name: Specify a name for the integration. (ex: UnityIS ACM Integration)
Integration plug-in: Select 'ISMilestoneACM'
Server Address: Enter the IP address of the computer that is running the “Milestone ACM” Driver. (Typically: localhost)
Server Port: Enter “5000”
Debug Message: Leave Unchecked
Click 'Next'.
Once the scanning of the access control hardware is completed, click 'Next'.
The next step is to associate cameras to doors by dragging the camera to the corresponding door. (This is not required)
Once completed, click 'Next'.
The window will display a message verifying the Milestone/UnityIS integration has been completed.
The 'Connection Status' will be display 'Connected'. Click 'Close' to finish the ACM integration configuration.
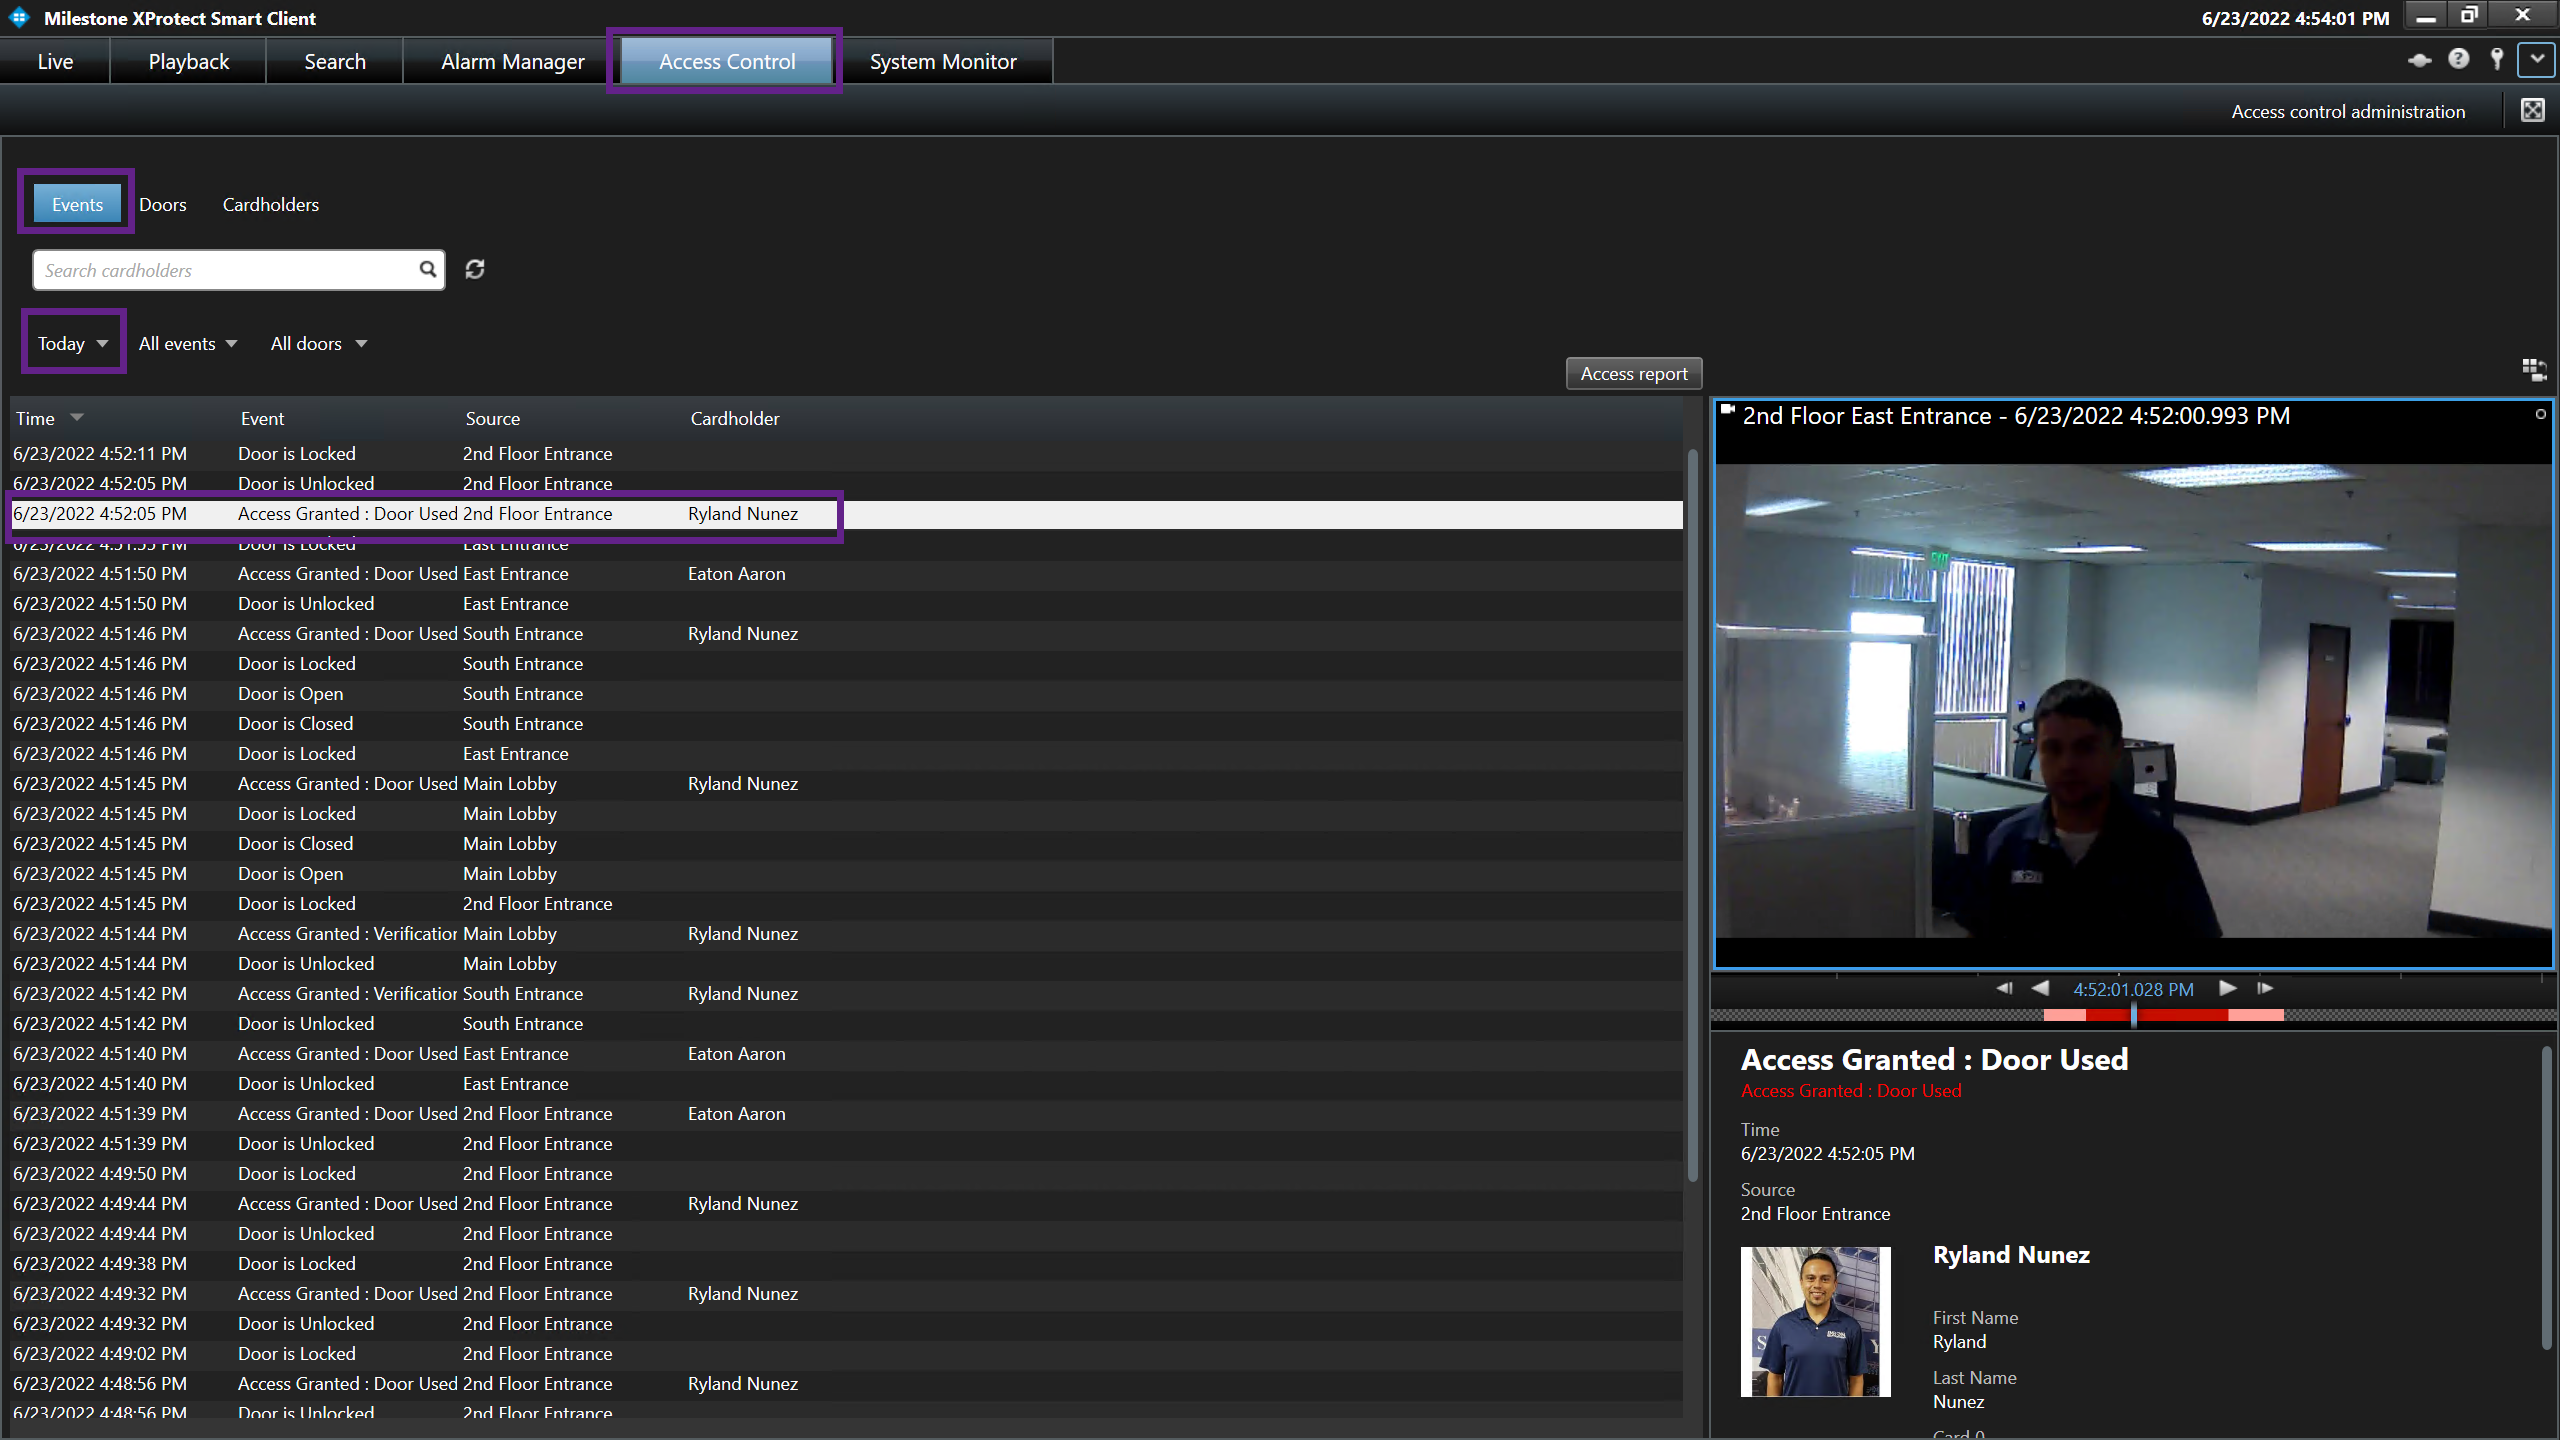
The UnityIS ACM integration is now complete. To verify that the integration is working:
- Launch the Milestone XProtect Smart client.
- Select the 'Access Control' module.
- Under 'Events' click on the 'All' dropdown menu and select 'Live Updates'.
- Present a valid card to a reader.
- You should now see an Access Granted event and video from the camera assoiciated to the reader (if any). (See Figure 14)
Figure 14: