Considerations Prior to Setup
- This guide will assist you in setting up the LP1501, LP1502, LP2500 or LP4502 controllers
- Port 3001 needs to be opened to allow communication between the Mercury controller and security management software
Mercury Controller configuration
1. Disconnect power to the Mercury Controller
2. From a PC or Laptop, connect directly to the controller via a cross-over cable.
3. Flip all 4 DIP switches on the Mercury controller to the “ON” position and connect power to the controller.
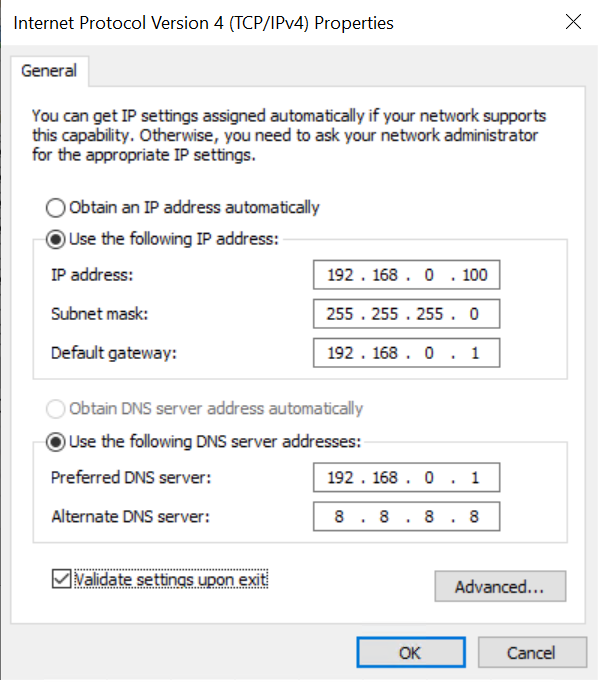
4. To access the controllers configuration page, disable your wi-fi network adapter and configure your ethernet network settings to the following: (See Figure 1)
Figure 1
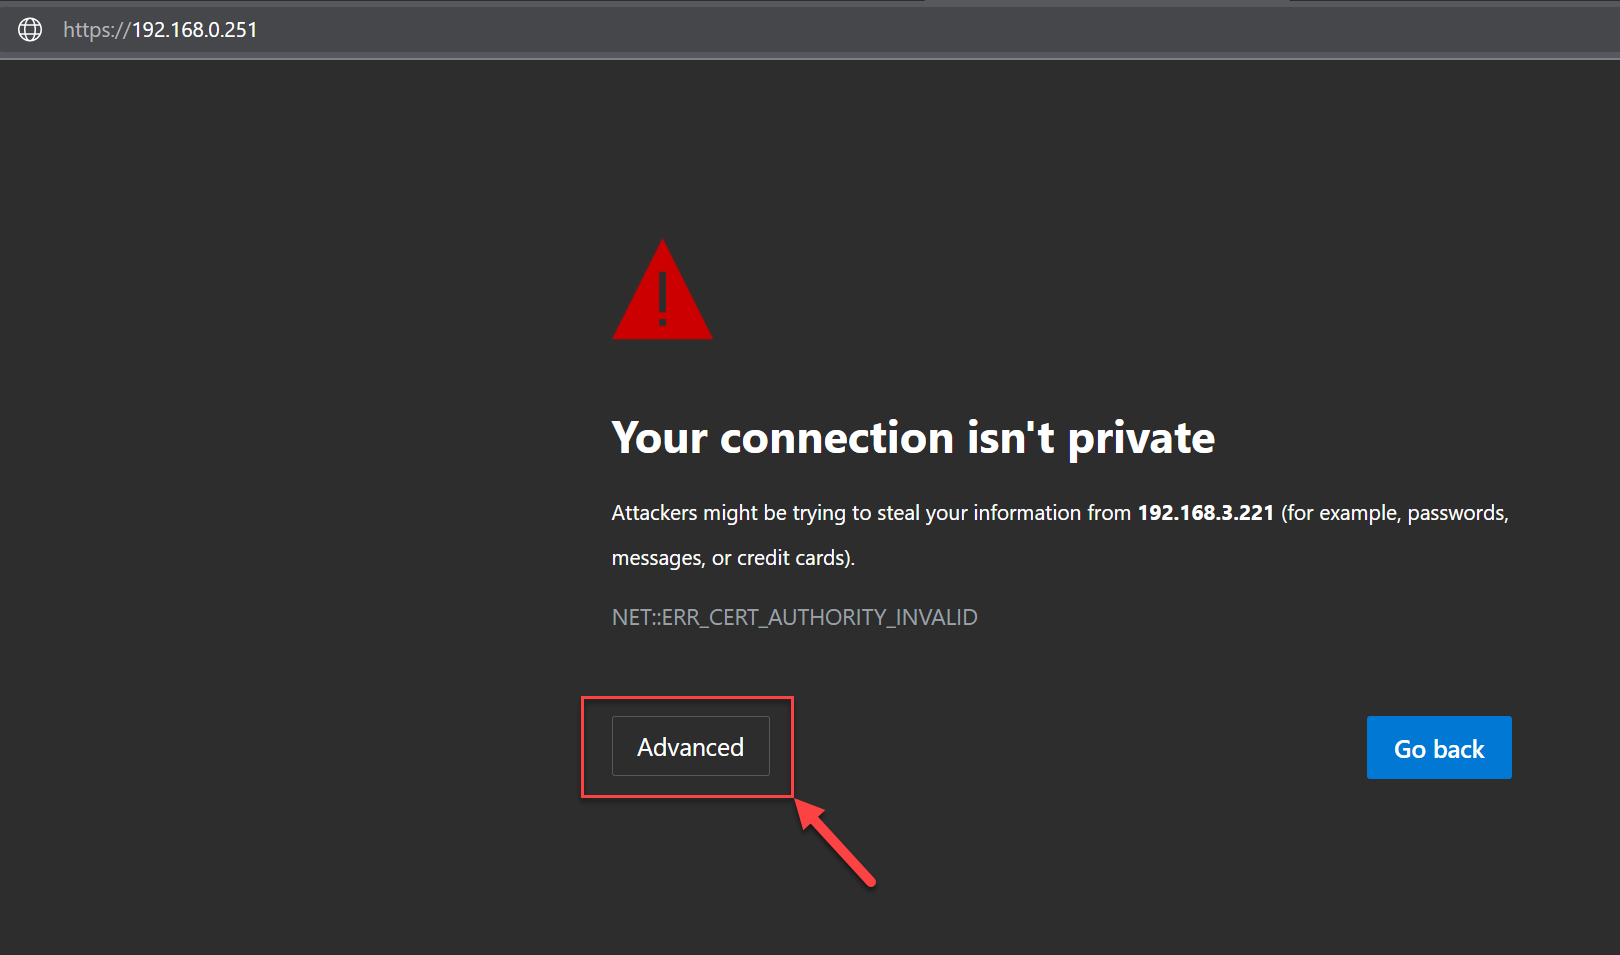
5. Open a web browser and type: http://192.168.0.251 to open the controller page.
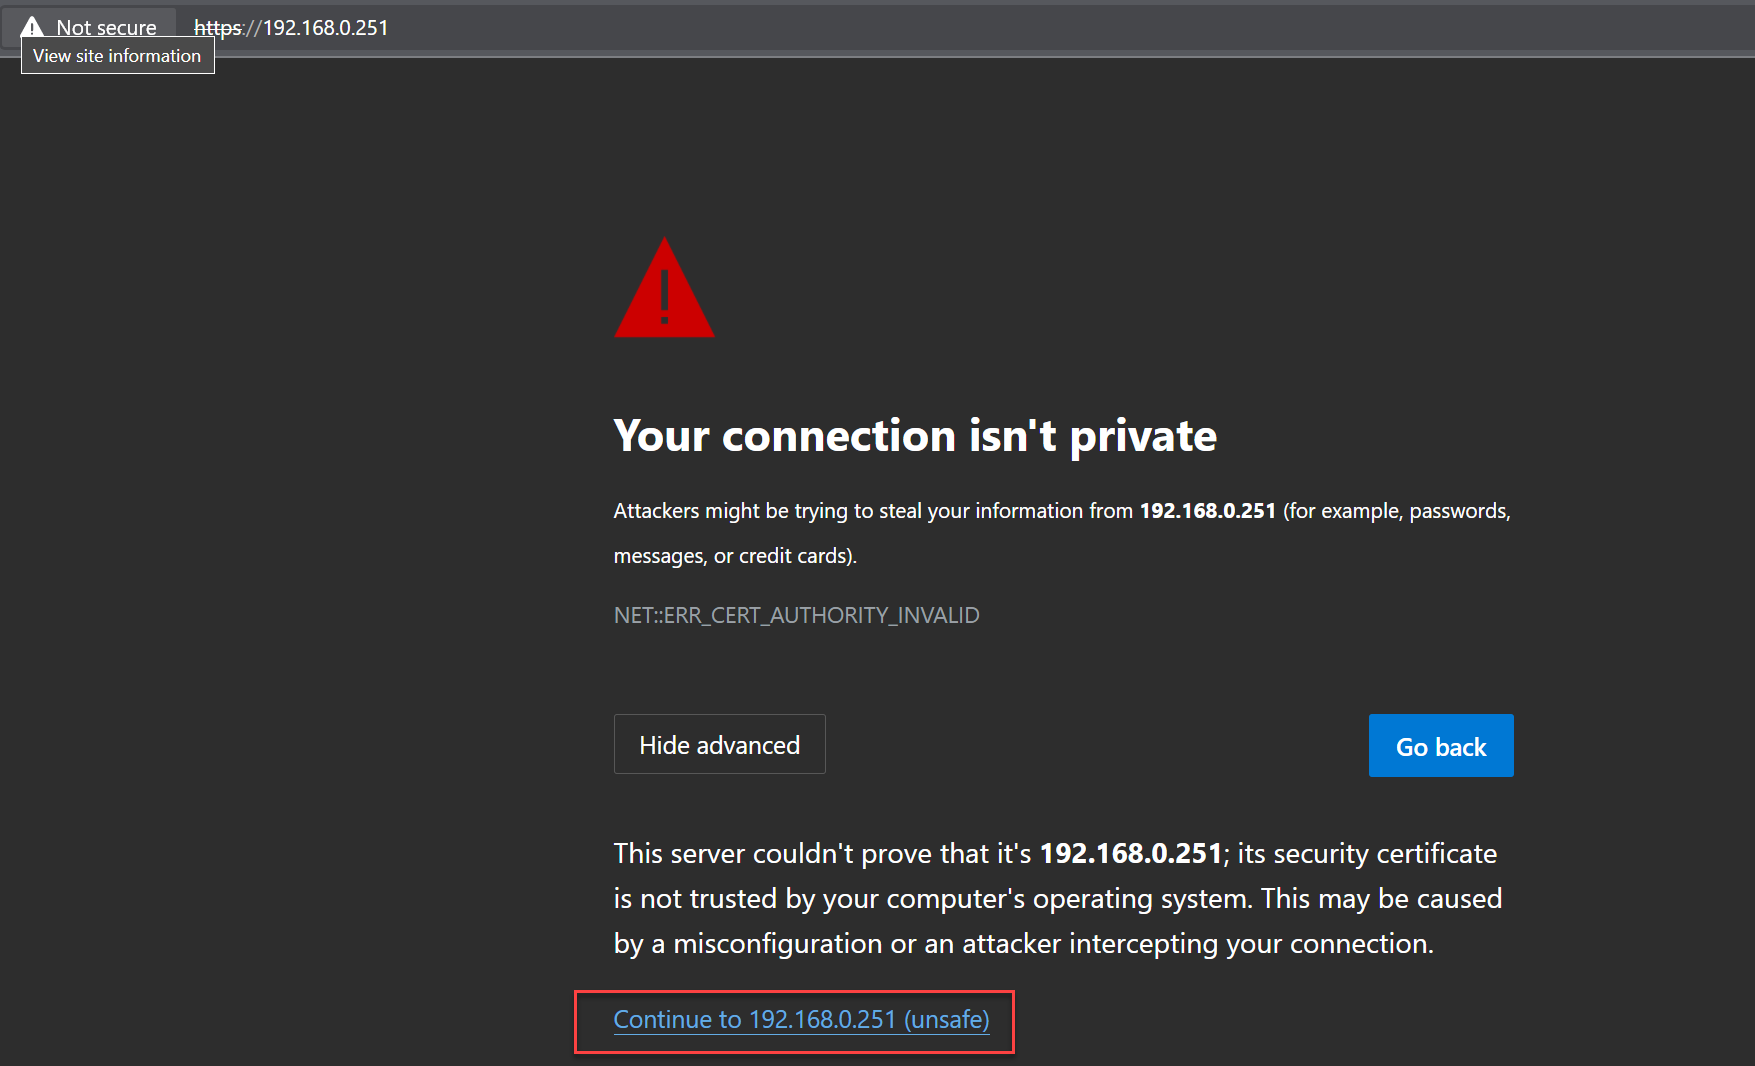
NOTE: If you get a certificate warning, ignore the warning and proceed to the webpage (See Figure 2)
Figure 2
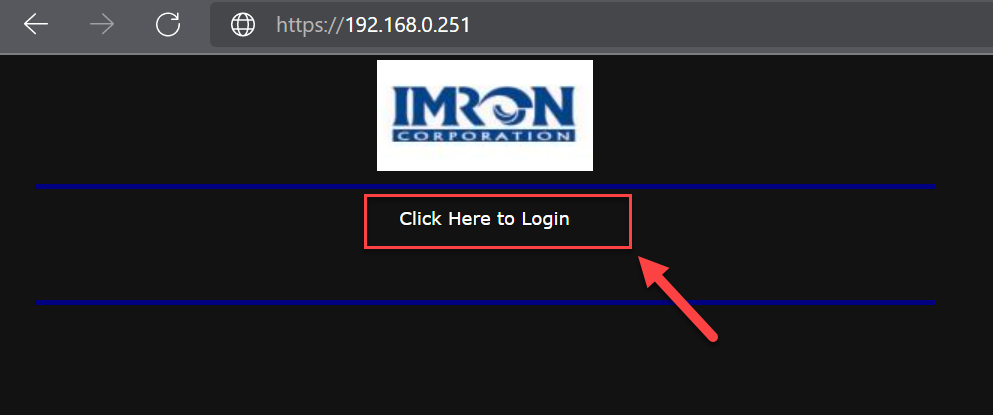
6. Click the “Click Here to Login” button to proceed to the login page. (See Figure 3)
Figure 3
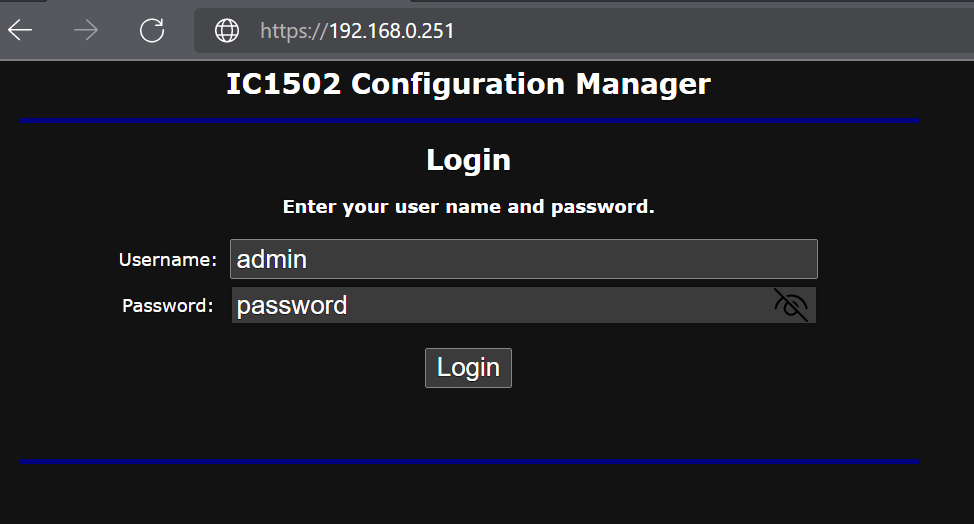
7. Enter the username and password to login the controller. (See Figure 4)
If you do not know the login information, you can use the default username and password:
User Name: admin
Password: password
NOTE: If you are going to log in using the default username and password, you must login within five (5) minutes of flipping the DIP switches to the “ON” position and powering on the controller. If more than five minutes have passed and you cannot log in using the default username/password, please perform the following:
Toggle dip switch #1 ON\OFF three (3) times (make sure it is on the “ON” position at the end of the cycle) and you will have another five (5) minutes to log in using the default username and password.
Figure 4
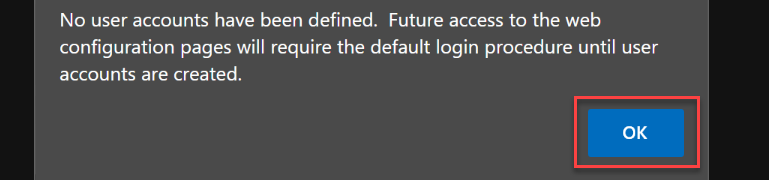
Note: If you see a warning stating no user account are defined, click 'OK' to continue, this is covered in step 10.
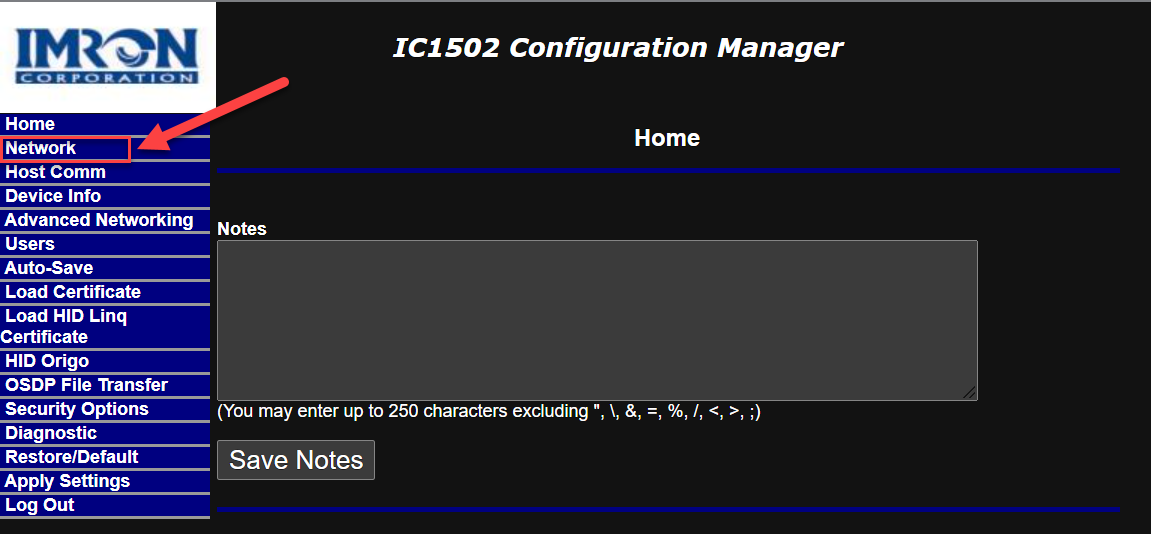
8. From the main menu pane, click on the “Network” button to view the Network Settings window. (See Figure 5)
Figure 5
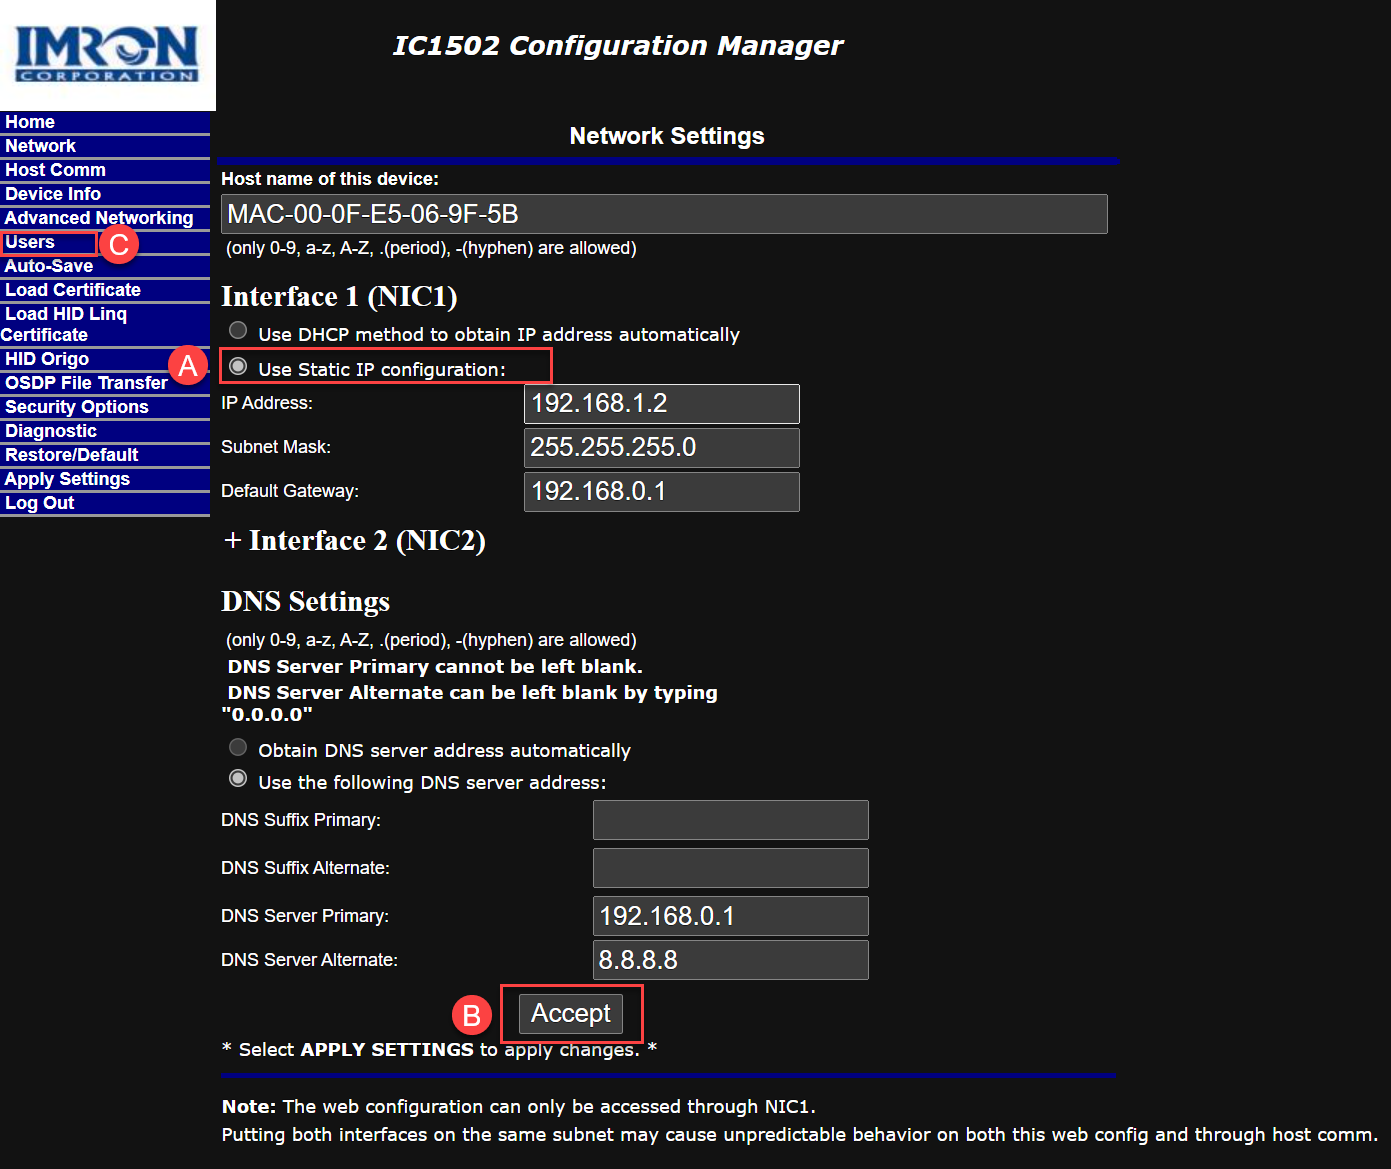
9. In the Network Settings window, complete the following:
- Select “Use Static IP Configuration” and enter your network parameters.
- Click the “Accept” button.
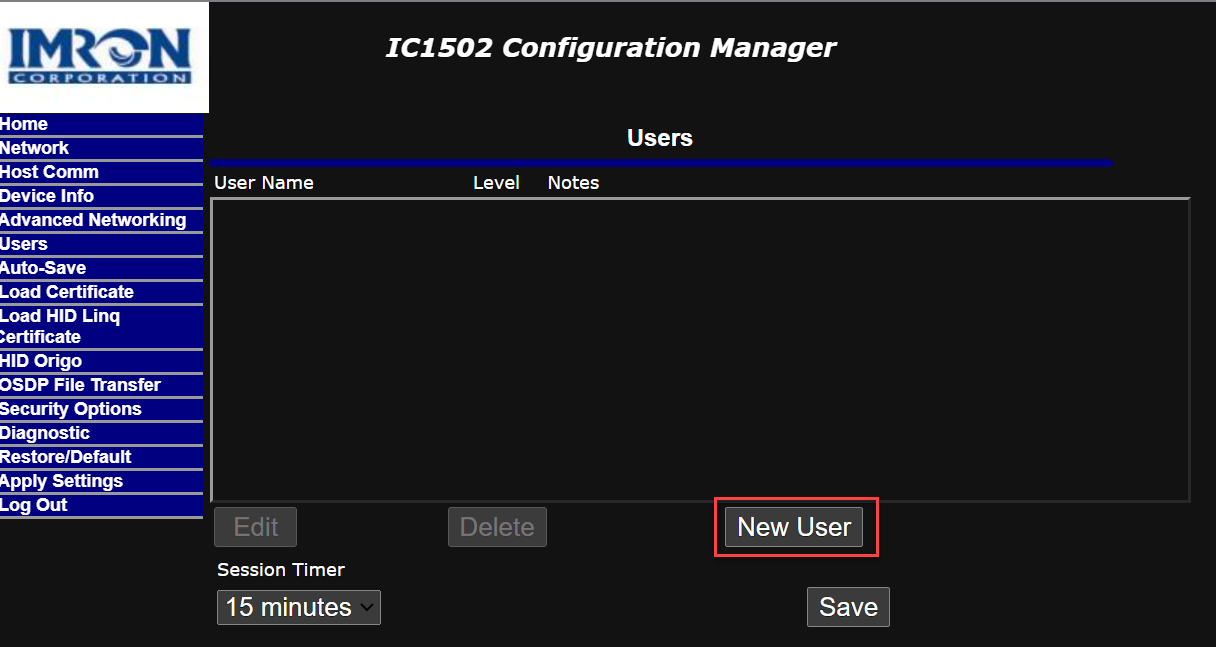
- From the main menu pane, click on the “Users” button. (See Figure 6)
Figure 6
10. In the Users window, click on the “New User” button. (See Figure 7)
(NOTE: If you already have a user account skip to step 12)
Figure 7
11. The User Account window will open. Enter the following:
- Select account level: Leave at “1”, this will grant you the highest permissions.
- sername: Enter a user name
- Password: Enter a password
- Password again: Enter password
- Notes: Enter any notes you would like for this user account.
Click the “Save” button. (See Figure 8)
Figure 8

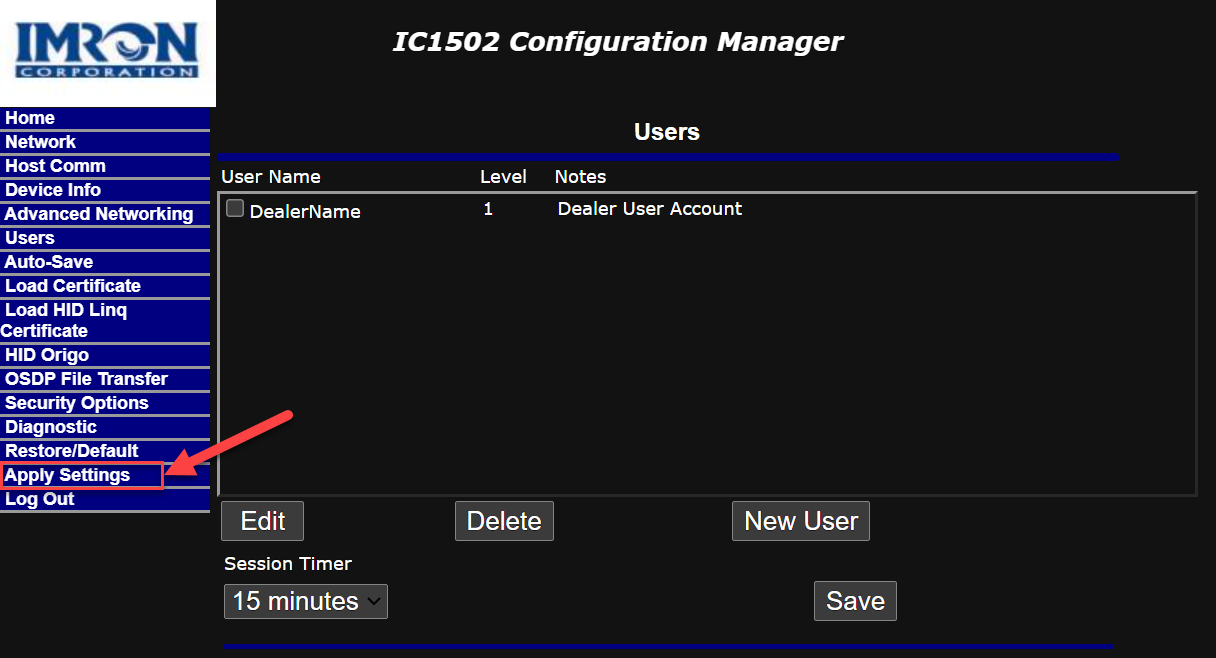
12. You will return to the Users window and you should now see the newly created user account. From the main menu pane, click on the “Apply Settings” button. (See Figure 9)
Figure 9
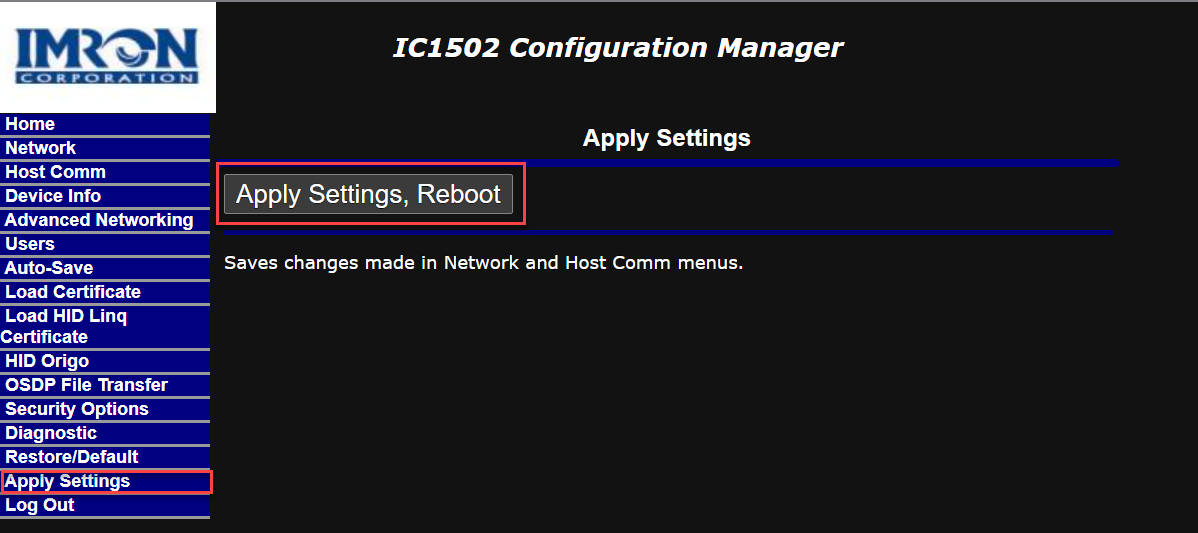
13. In the Apply Settings window, click on the “Apply Settings, Reboot” button. (See Figure 10)
Figure 10
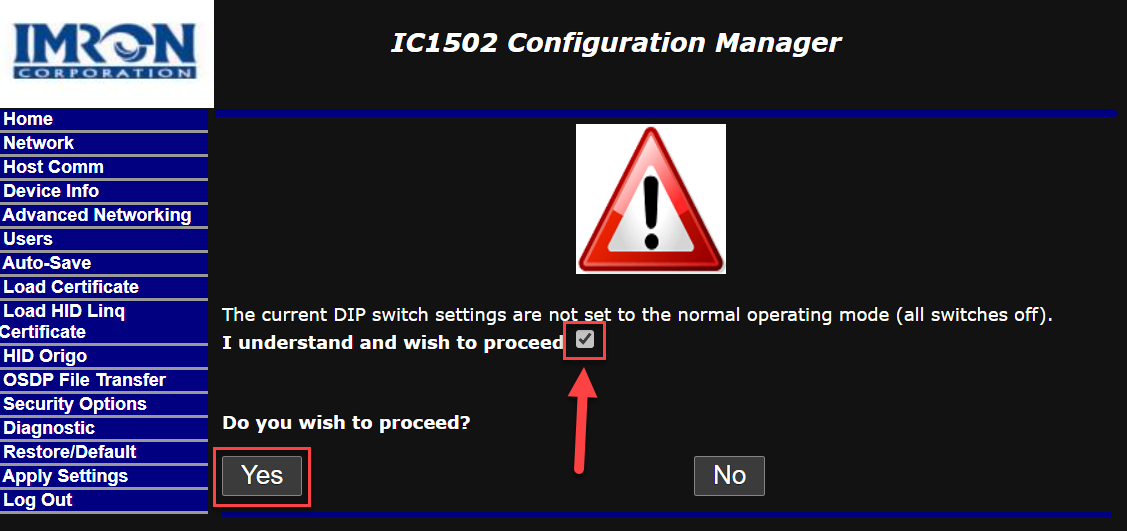
14. After clicking on the “Apply Settings, Reboot” button, a new webpage will load. Click/check all the boxes and under “Do you wish to proceed”, click “YES.” (See Figure 11)
Figure 11
15. Once the controller finishes the reboot procedure (This may take approximately one minute), complete the following:
- A. Disconnect the power to the controller.
- B. Flip all 4 DIP switches to the “OFF” position.
- C. Connect power and network cable to the controller.
- D. After the controller boots up, ping new IP of controller.
- D. You can revert your network settings on your PC.