This guide outlines the steps to add or update a person using the REST API. The tool used for this demonstration is Postman.
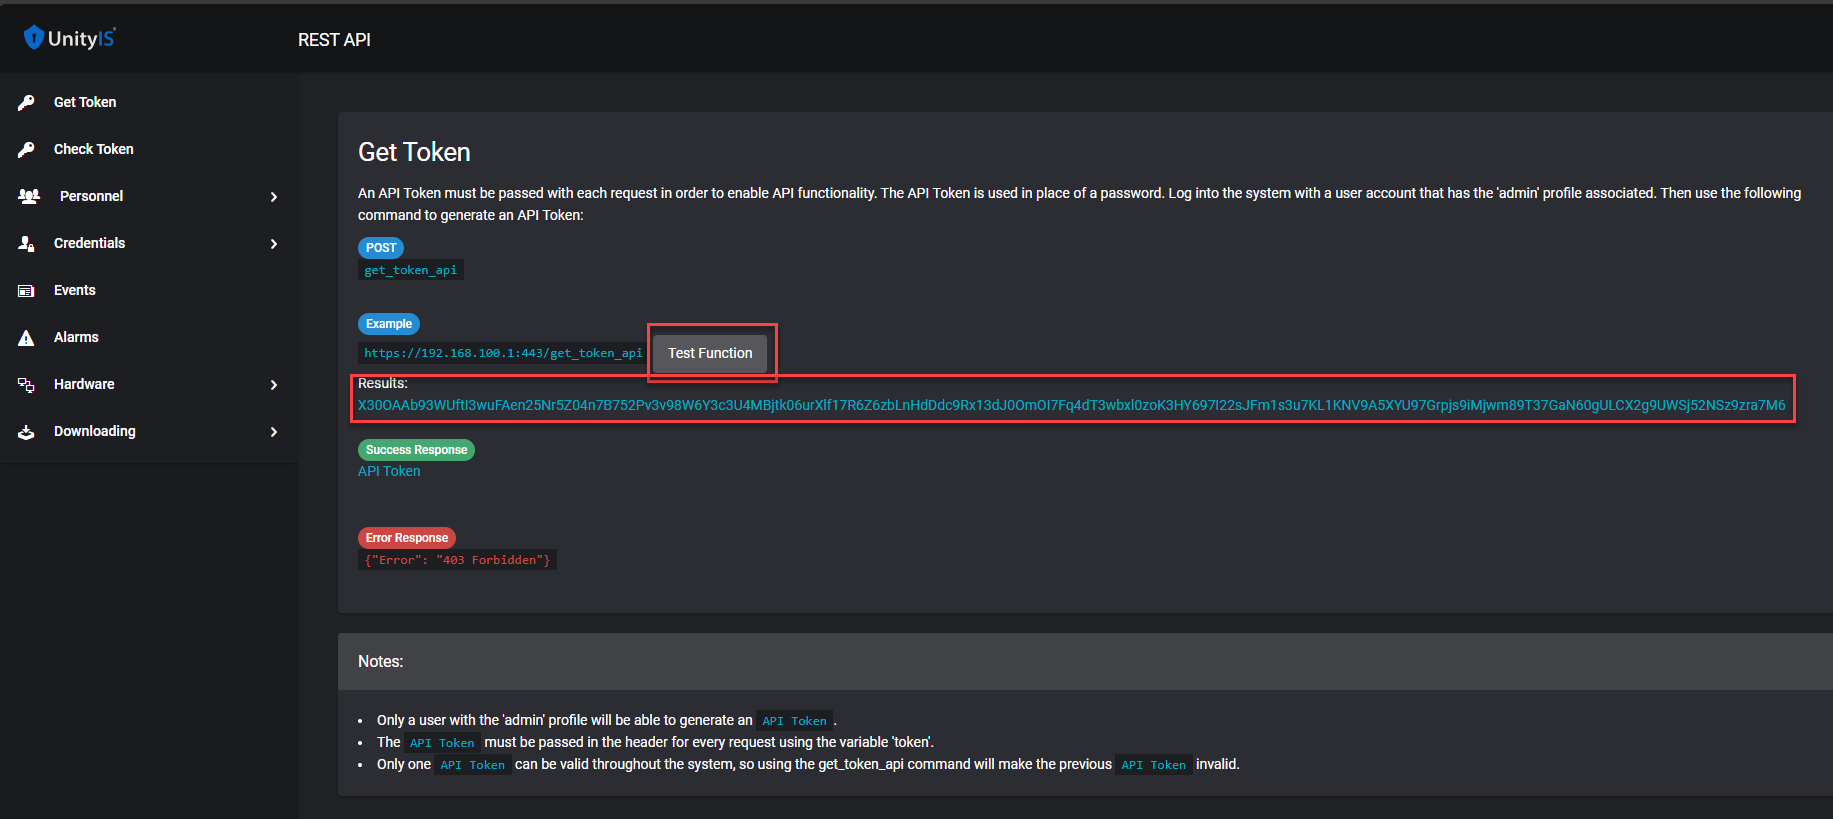
1. Generate API Token
Log in to Access Control System using the
adminoperator/profile.Navigate to Configuration → REST API.
Click on Get Token, then click Test Function to generate an API token.
The generated token will be displayed under the Results section.
Important: This token should be used consistently throughout the session. If you regenerate a token, the previous one will become invalid.
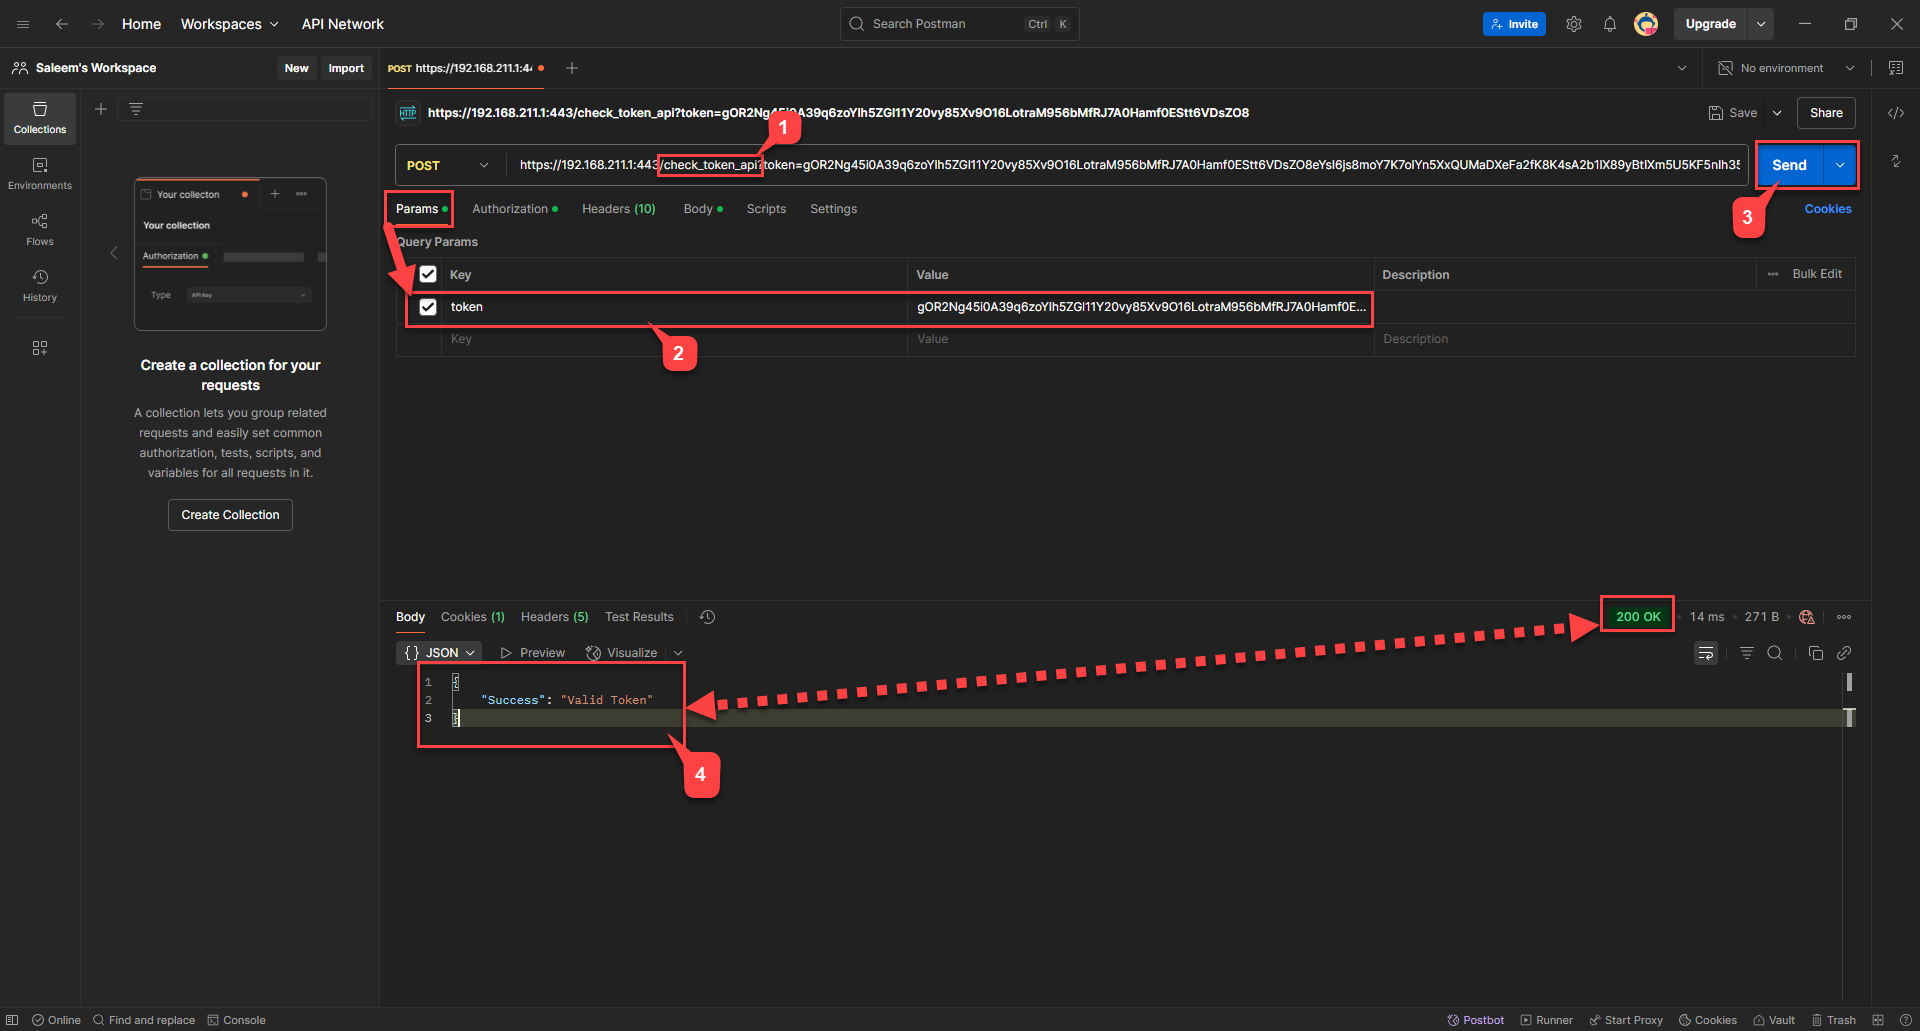
2. Verify Token Validity
To confirm that your token is valid:
Use the
check_token_apiendpoint.Pass the token as a query parameter.
A valid response will return:
{
"Success": "Valid Token"
}
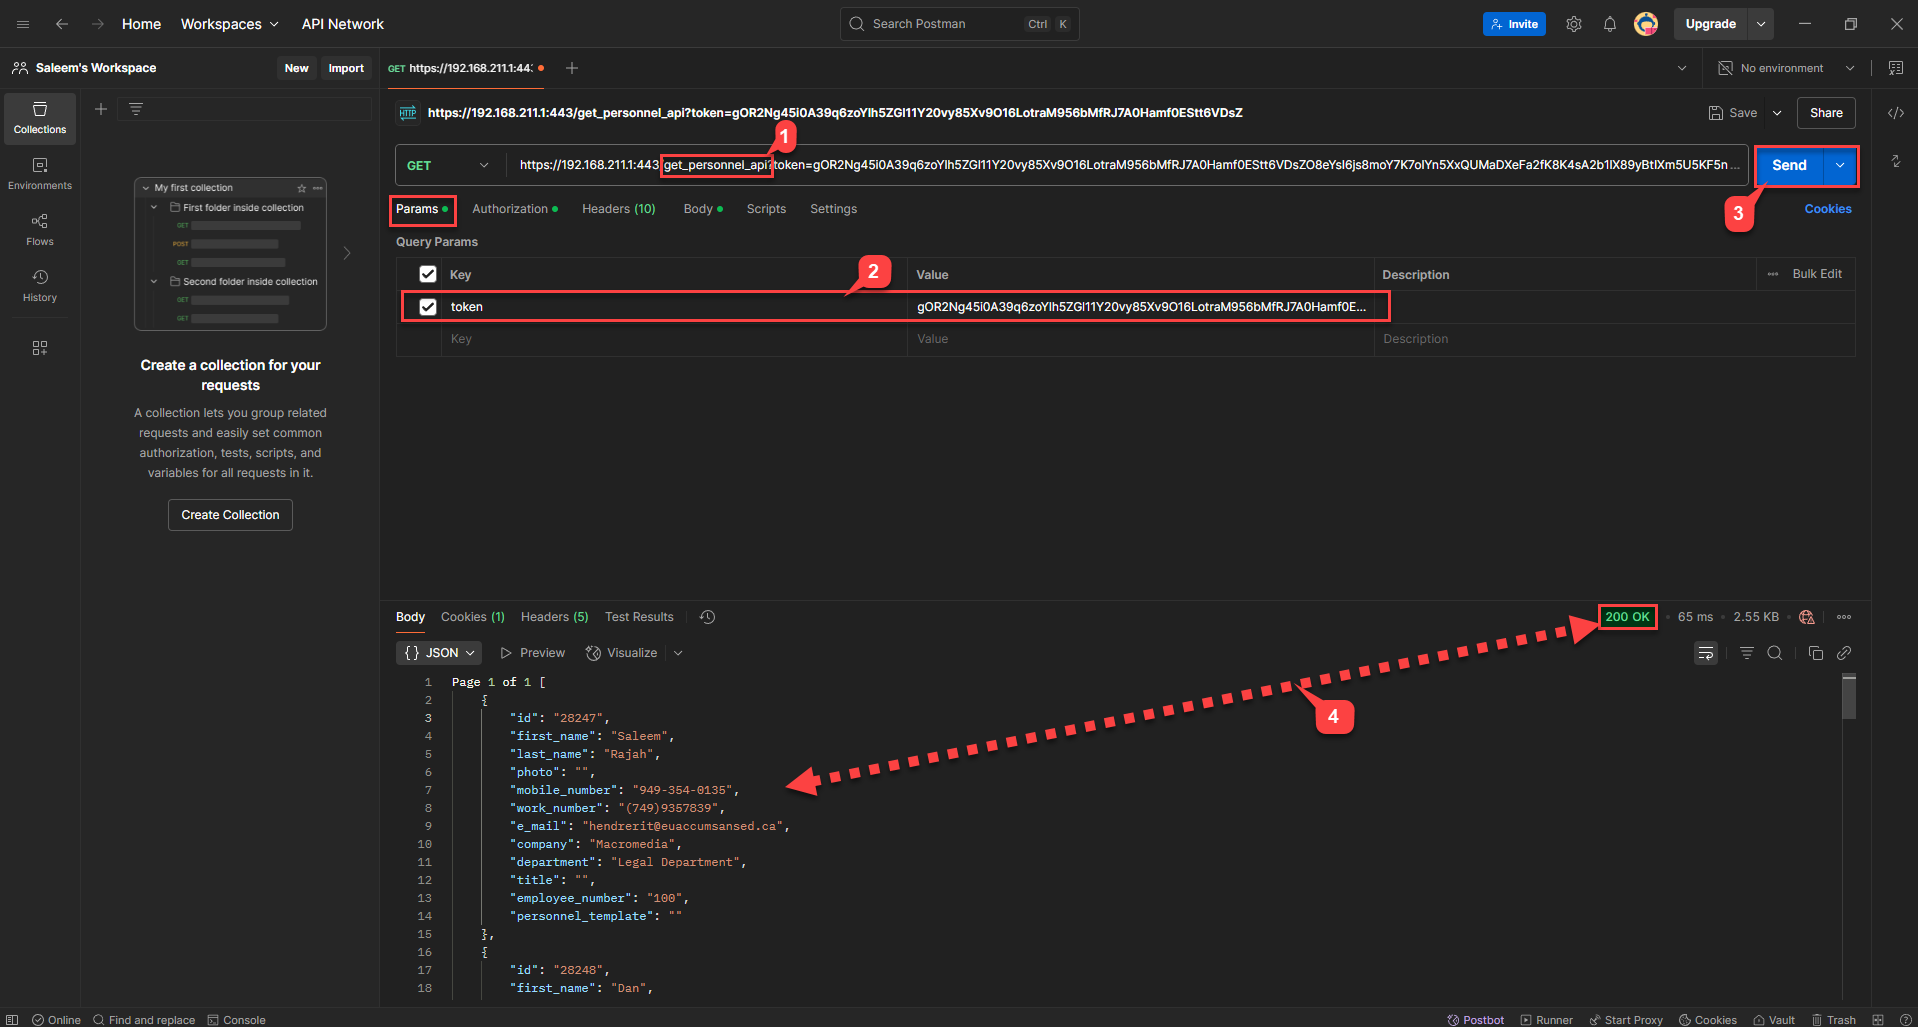
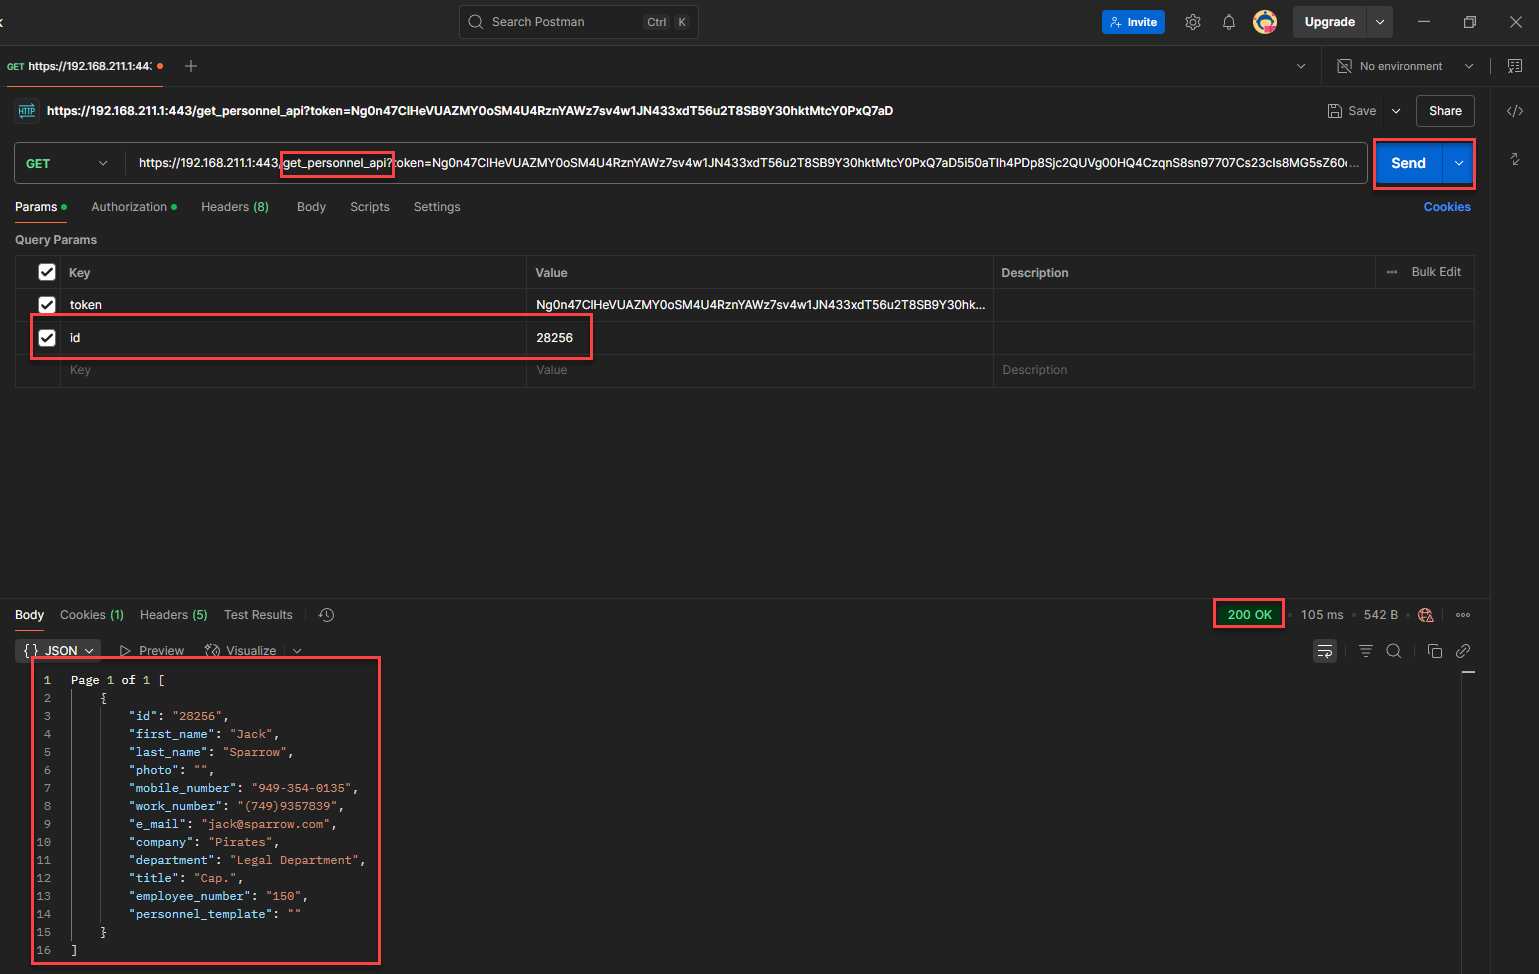
3. Retrieve Personnel Records
To retrieve personnel records:
Use the
get_personnel_apiendpoint.Pass the previously generated token as a parameter.
Upon success, you'll receive a 200 OK response along with personnel records in JSON format.
Note: If you generate a new token at this stage, the previously generated token will no longer work.
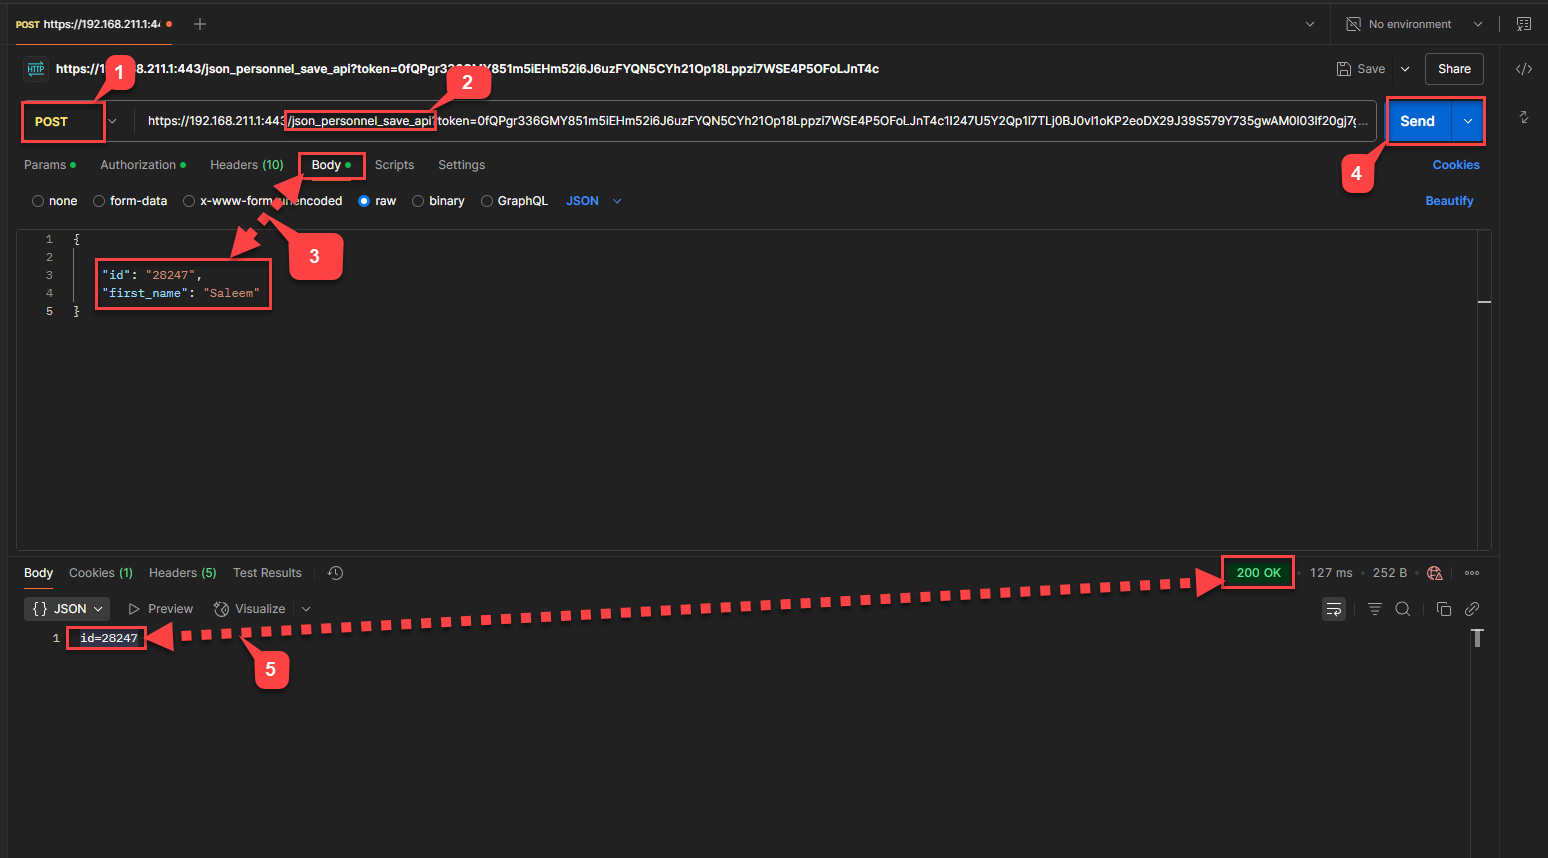
4. Update or Add a Person
Use the json_personnel_save_api endpoint to either update an existing person or add a new one.
To Update a Person:
Include the ID of the existing person in the JSON body.
Modify the fields as needed (e.g., changing
first_nameto"Saleem"for person ID28247).A successful update will return a 200 OK response along with the person's record ID.
To Add a New Person:
Use the same
json_personnel_save_apiendpoint.Do not include an
IDin the JSON payload.A new person will be created, and you will receive a 200 OK response with the new person ID (e.g.,
ID = 28256).
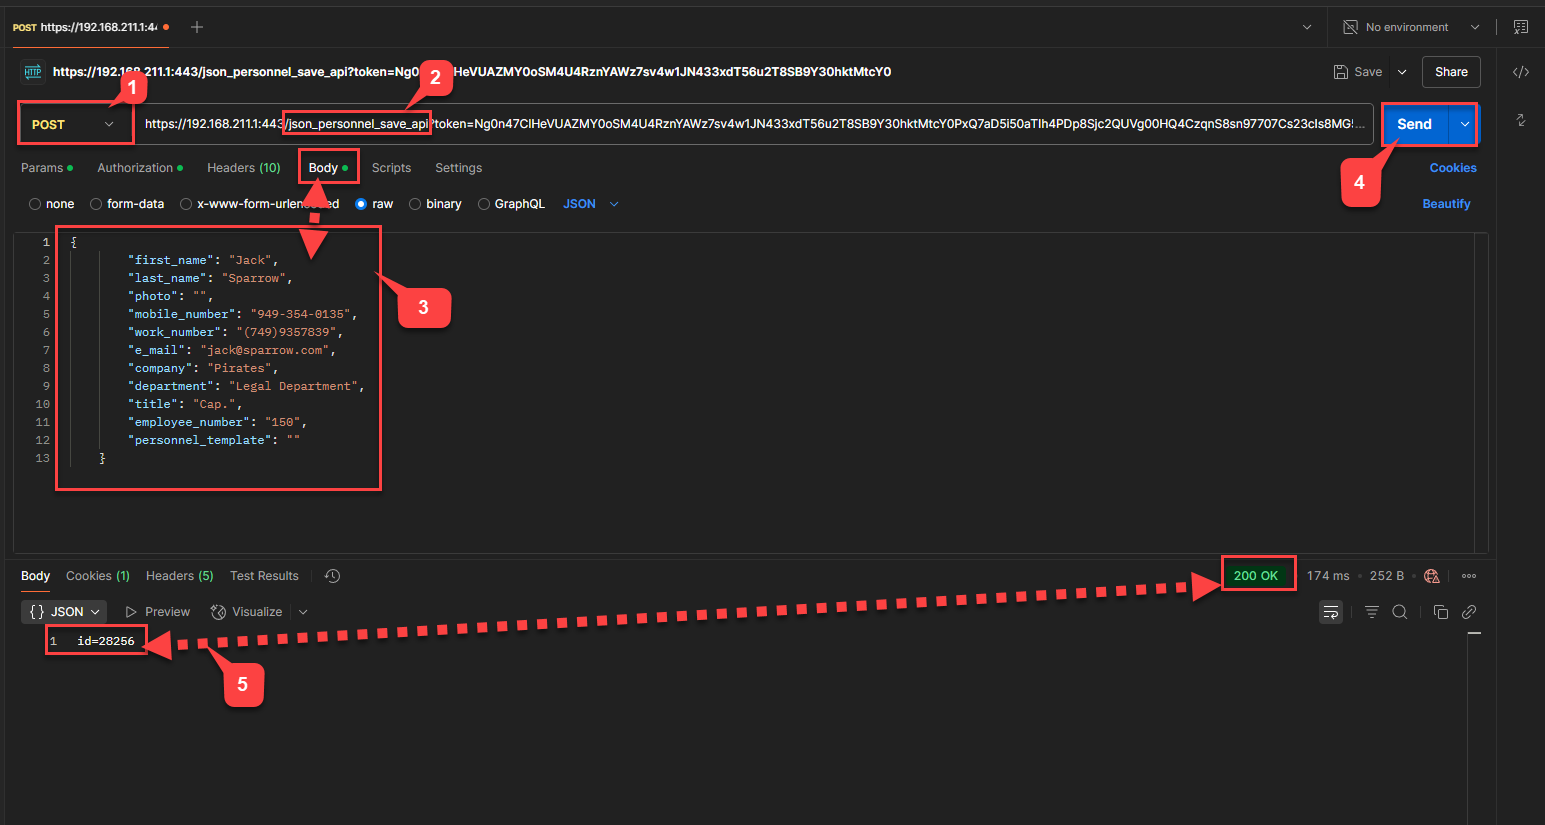
Here is the newly created person with ID = 28256
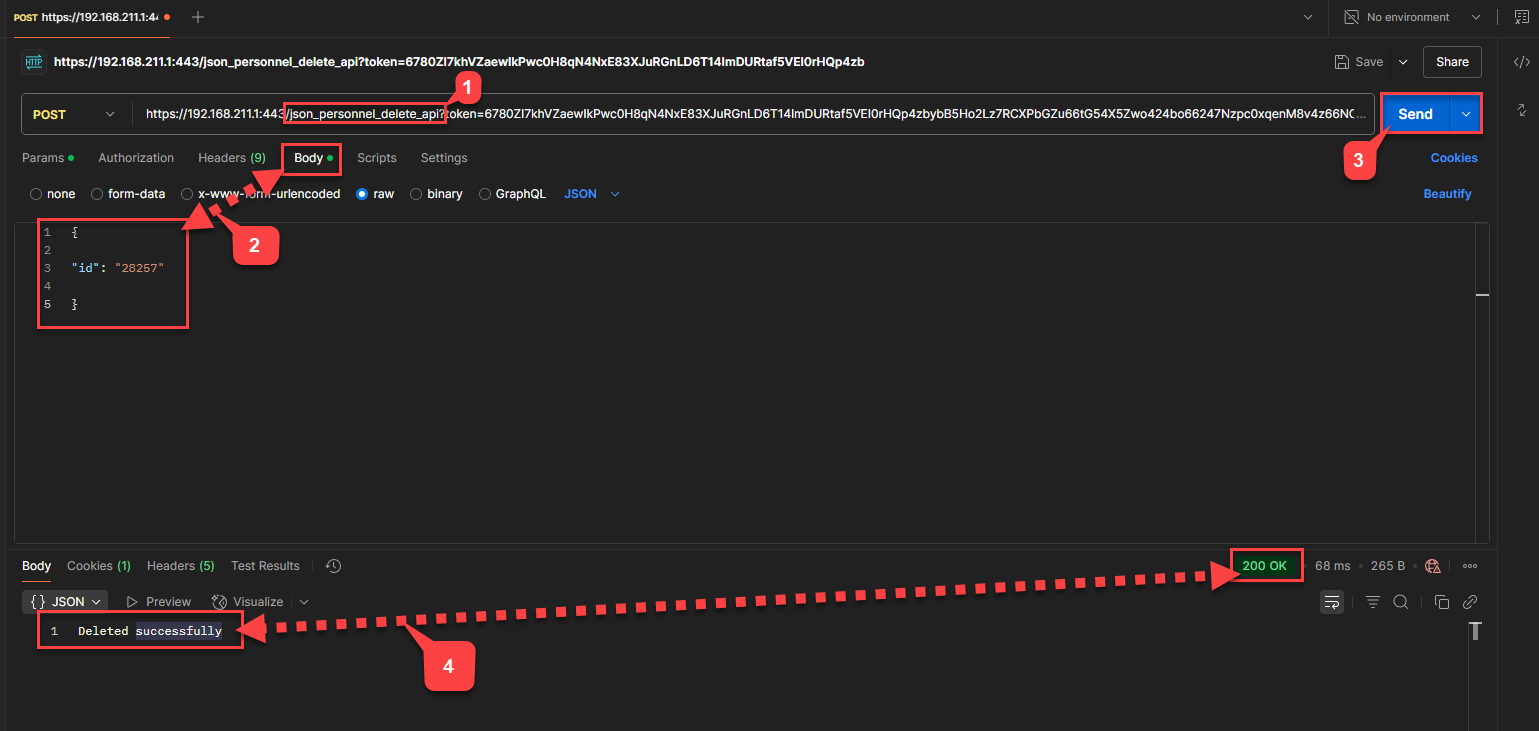
5. Delete a Person
To delete a person:
Use the
json_personnel_delete_apiendpoint.In the JSON body, pass the ID of the person you want to delete.
A successful request will remove the person from the system. See the screenshot below for reference.
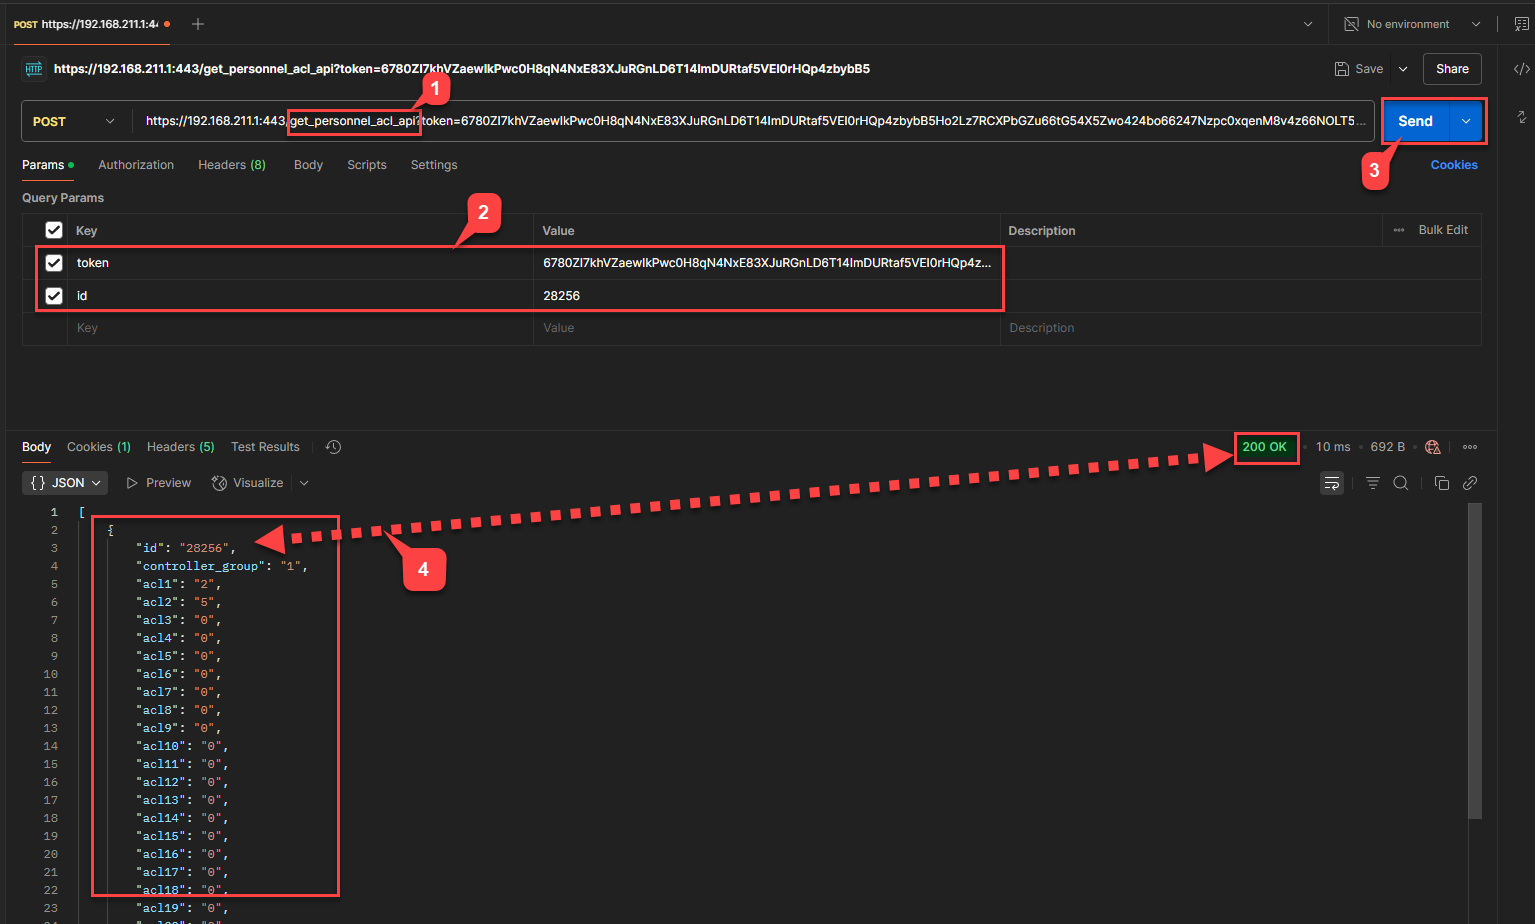
6. View and Modify Access Levels
To View Personnel Access Levels:
Use the
get_personnel_acl_apiendpoint.Pass the same token, generated in step -1, person ID to retrieve access level data for that person.
The response will include all access levels currently assigned to the person.
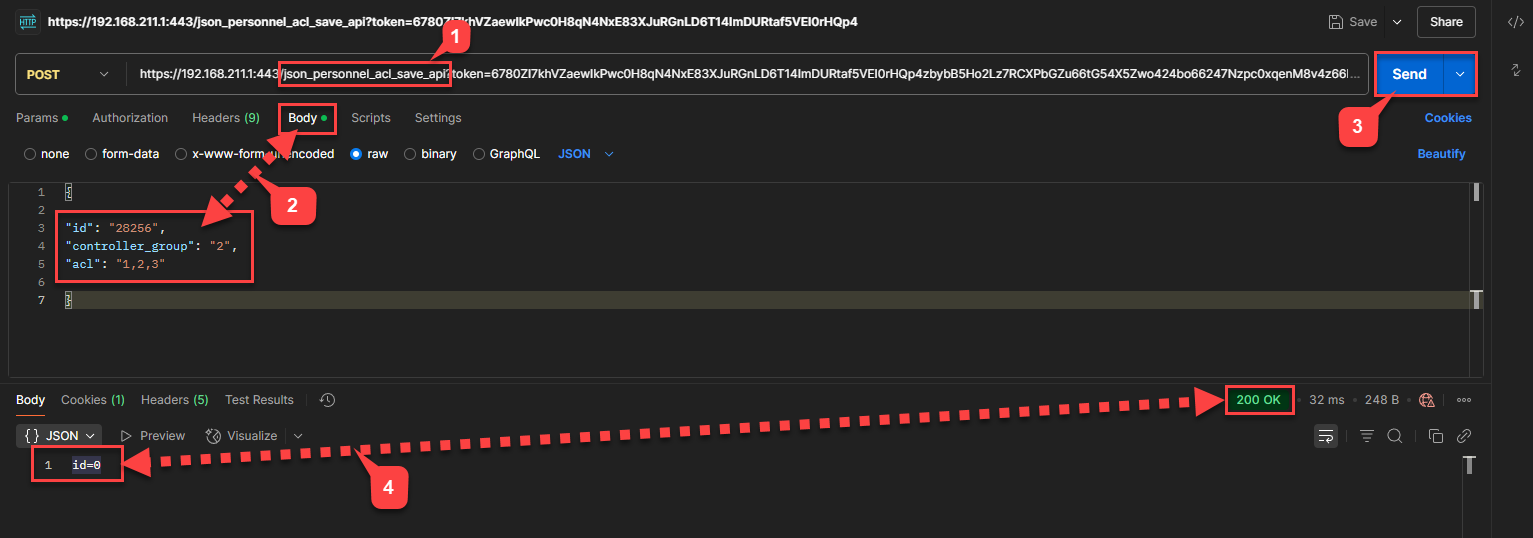
To Add or Update Access Levels:
Use the
json_personnel_acl_save_apiendpoint.Pass the following in the JSON body:
{
"ID": "28256",
"controller_group": "2",
"acl": "1,2,3"
}
Where:
IDis the person's unique record ID,controller_grouprefers to the controller group, in this case controller group 2,aclincludes a comma-separated list of access levels, in this example, we are adding access levels 1, 2 and 3 to this person.
To delete access levels from a person, pass an empty string for acl, as shown below
{
"ID": "28256",
"controller_group": "2",
"acl": ""
}