Please follow the steps below to configure the SAFR-Scan reader:
Hardware Setup
- Connect the SAFR-Scan to a PoE network.
- Wire the Wiegand output of the SAFR-Scan to the Wiegand port of the access control panel.
Configure SAFR Server
- Access SAFR Cloud Console: https://safr.real.com/console
Configure SAFR-Scan to Connect to SAFR Server
- From a web browser enter the IP address of the reader
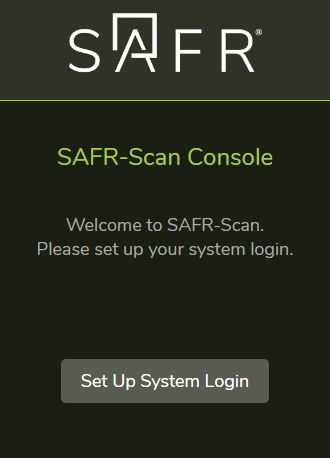
- Click on 'Set Up System Login' and set the admin password and the password recovery email.
- Login to the SAFR-Scan
- Select the 'System' menu from the top
- Specify the type of Server to connect to followed by the connection information:
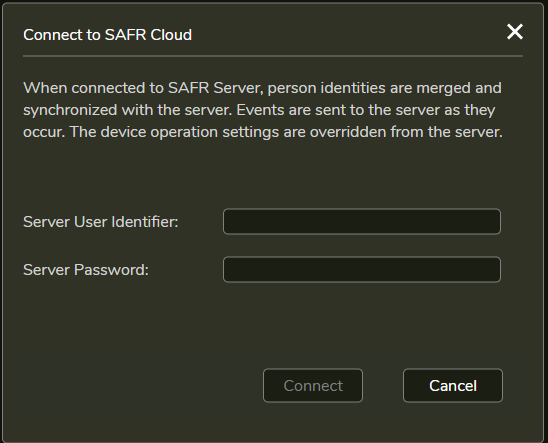
- SAFR-Scan will sync with the server.
Configure a custom Card Format in the software
- Add a 56-bit card format to all controllers, that will be using a SAFR-Scan, with the following parameters:
- Facility Code = -1
- Format Function = 1- Wiegand
- Bits on Card = 56
- Credential # Bits = 56
- Configure the software to connect to the SAFR server from the System Settings page:
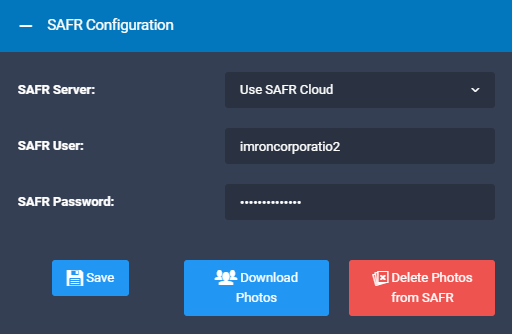
Once configured, click on Delete Photos from SAFR to remove any old images from all SAFR-Scan readers. This process will take about 25 seconds to complete. If your personnel records already have photos assigned, then click on the Download Photos command to load the new photos to all of the SAFR-Scan readers. If your personnel records do not have photos already assigned, then photos will automatically get downloaded to all SAFR-Scan readers as photos are assigned in Personnel Manager.
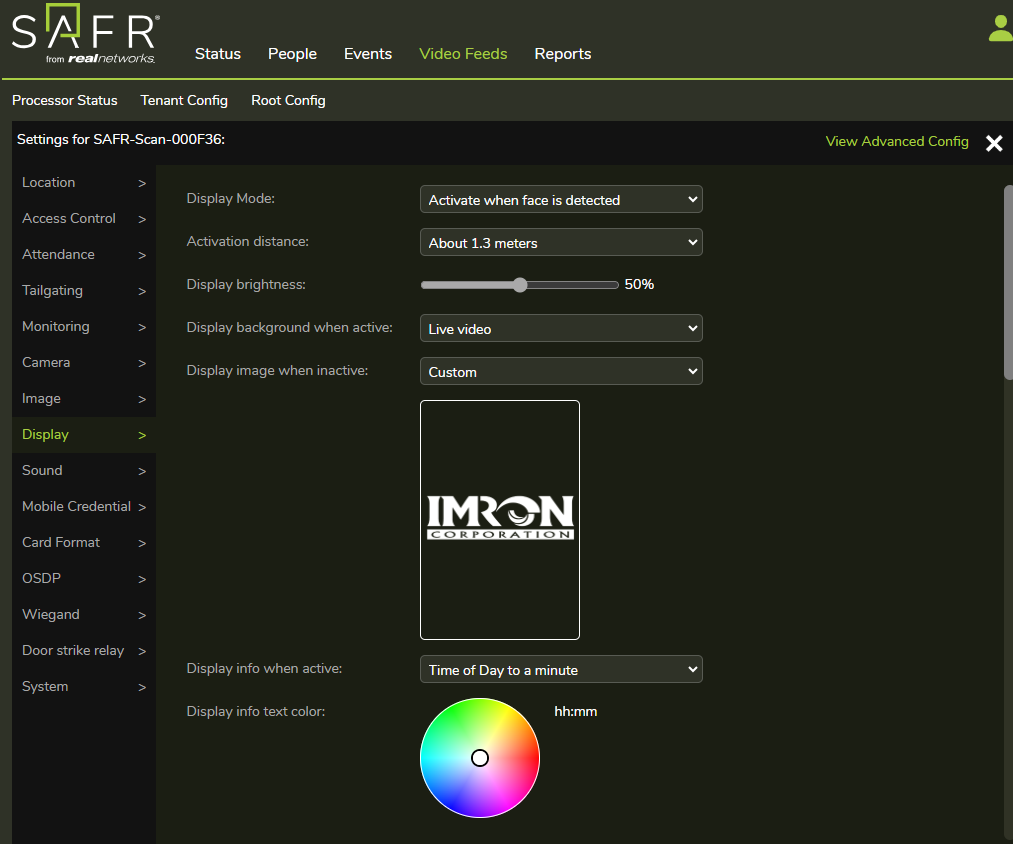
Customize SAFR-Scan Logo
- Log into the SAFR Server
- Select Video Feeds from the top menu
- Find the SAFR-Scan that you wish to customize and click the Config button next to it.
- Click on Display and then set the 'Display Image When Inactive' to 'Custom'
- Choose a custom file that is 320 x 480 as the static custom image.