Steps to adding Azure Controllers (IC2/IC4) and ZK Atlas Panels (Atlas 100/160/200/260/400/460)
Pre-requisite
- Azure requires a minimum firmware of 2.3.8. (We recommend updating to firmware 2.6.8 or later for stability fixes. Contact Support for additional information)
- ZK Atlas requires a minimum firmware of 3.6.8
- Requires a minimum software version of 11.26.1
- Downloading the Host Com certificate:
- Login to the Web Client as an administrator. Navigate to Configuration ➔ Hardware Manager
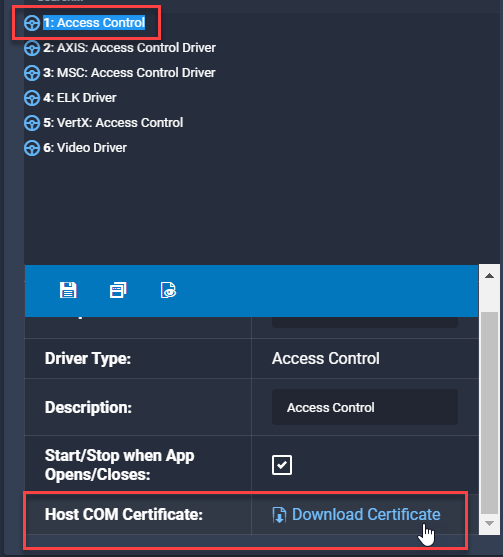
- In the Hardware tree, select the Access Control Driver
- In the Property window, scroll down the properties to Host COM Certificate section and click on “Download Certificate”
- Save this certificate file and note the location of where the file is saved
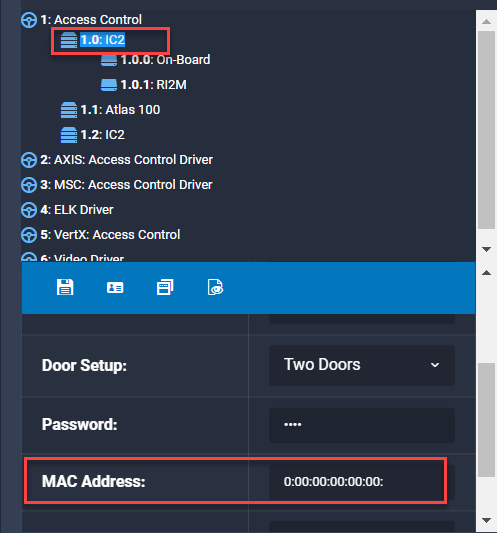
- Add IC2 controller to the driver.
- Click on the newly added controller.
- Scroll down in the hardware properties to the MAC Address field.
- Enter the full MAC address of the panel xx:xx:xx:xx:xx:xx. The MAC Address of the panel can be found by logging into the panel, clicking “Menu” ➔ “About”.
- For IC2, the MAC Address typically starts with 00:60:ee
- For ZK Atlas, the MAC Address typically starts with 00:17:61
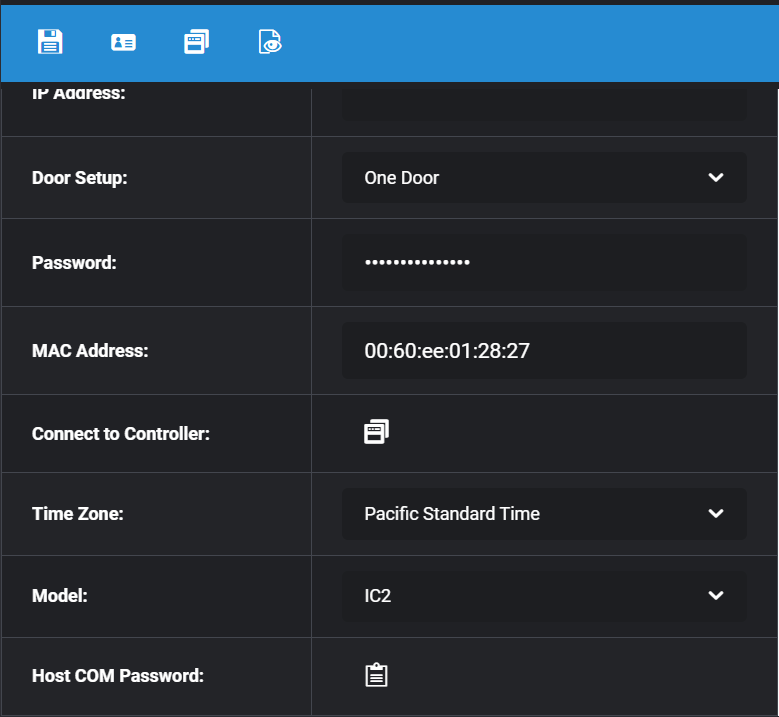
- At the bottom of the Controller property window, locate the Host COM Password field and click on the clipboard to copy the password.
- Log into the IC2 or Atlas panel.
- If the panel has not been configured or has factory reset, enter the default username/password:
- IC2/IC4 – admin/pass
- ZK Atlas – admin/admin
- If the panel has connected to the security management software, the username will be “admin” and the default password will be:
- IC2/IC4 – “ic-xxxxxx”, where the xxxxxx is the last 6 digits of the MAC address, in lower case.
- ZK Atlas – “pass”
- If the panel has not been configured or has factory reset, enter the default username/password:
- Click on “Admin” ➔ “Host Communications”.
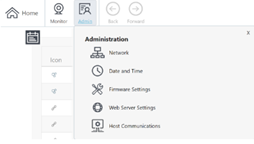
- Upload the certificate that was downloaded in step 1.
- Ensure that the “Host Communications Enabled” is check.
- Enter the URL if it is a cloud site (example.imron.com) or an IP address (local server) into the “Host” field.
- Enter 9723 into the “Port” field.
- Click the “Change” button to change the password on the panel. Use the password from Step 6 that was copied to your clipboard.
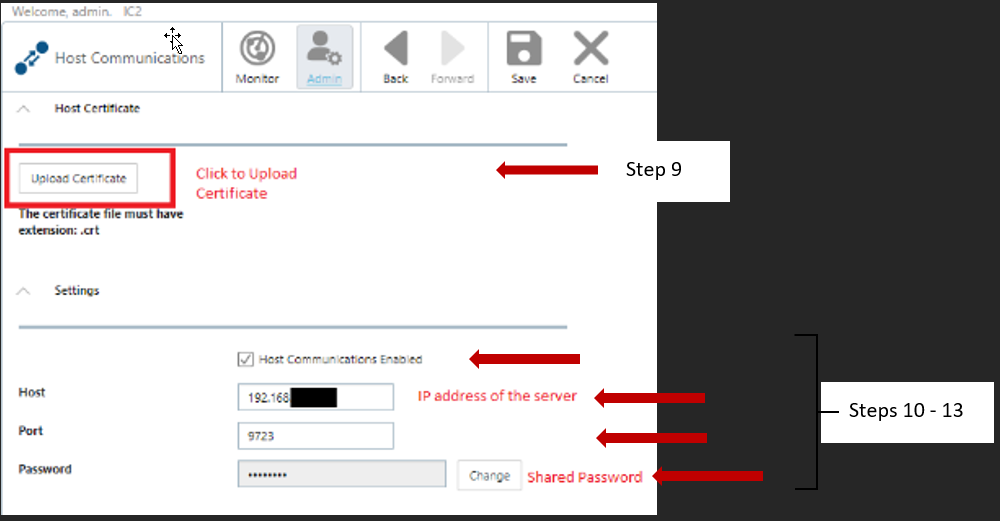
- Click on the “Save” button.
- The panel should now come online in the software.
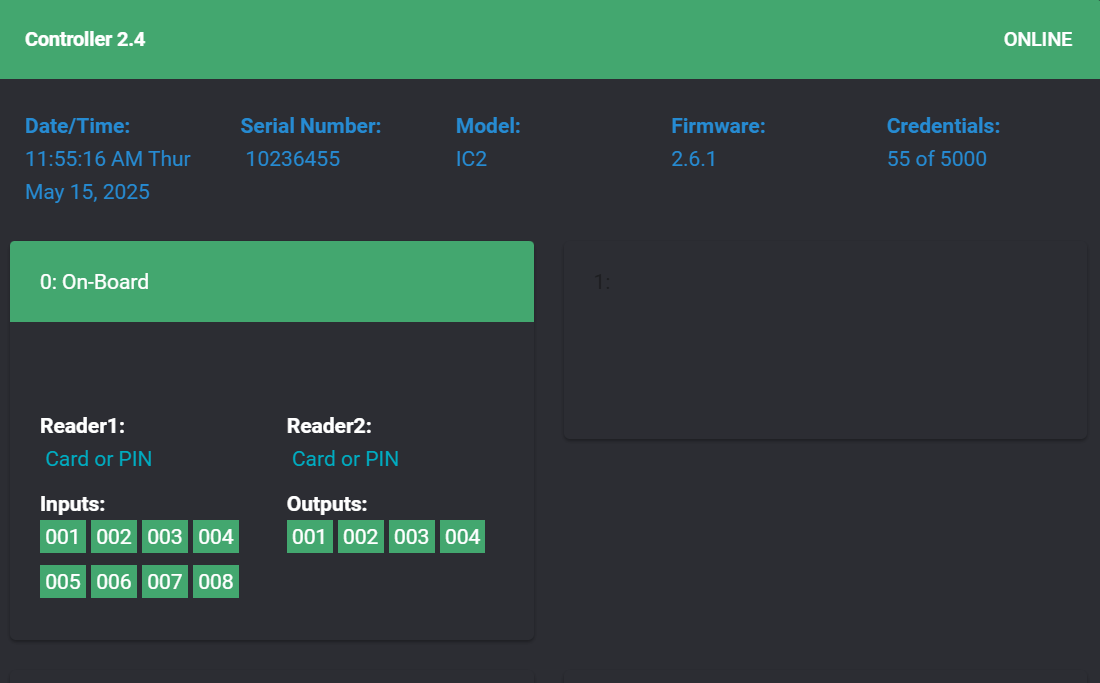
- Launch Download Manager and send a 'Hardware' download to the controller. The controller should now show online in the Controller Status screen:
- Complete.
NOTE
It is recommended to change the password for the panel to ensure the security of the panel. To change the login password of the panel, change the password from Hardware Manager.
Once the password is updated, perform one of the following:
- Download hardware
- Stop/start polling the panel
- Restart the driver